Ge Refrigerator Water Filter Compatibility Guide
You’ll match GE filters by series and fridge model.
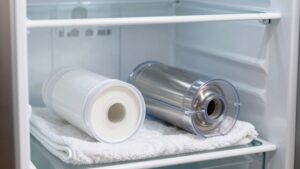
Older MWF/MSWF/GSWF fit legacy housings.
XWFE replaces XWF on newer premium units.
RPWFE fits RFID-enabled refrigerators; avoid RPWF in RFID units.
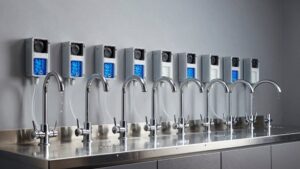
Check cartridge diameter, length, connection type, and rated GPM to ensure proper fit and simultaneous ice/water use.
Use GE’s model lists or Filter Finder and match OEM specs or verified third-party equivalents.
Follow the model-specific reset sequence after flushing to complete installation and troubleshooting guidance.
Quick Overview
- Match the filter series (e.g., MWF, XWF/XWFE, RPWF, RPWFE) to your refrigerator model using GE Filter Finder or the owner’s manual.
- For RFID-enabled refrigerators, choose RPWFE (with RFID chip); avoid RPWF in RFID units to ensure proper communication.
- Prioritize physical dimensions, connection type, and rated flow (GPM) to ensure proper fit and water delivery.
- Use OEM-equivalent replacements that match OEM specs; avoid undersized or low-flow third-party filters.
- After installing a compatible filter, flush several minutes of water and perform the model-specific reset to clear indicators.
500 Series Filter Comparison
How do you choose the right GE filter series for your refrigerator? You check series compatibility and RFID status first: Older MWF/MSWF/GSWF fit legacy models. XWFE replaces XWF for premium post-2015 units. RPWFE is for RFID-enabled fridges and carries a chip for status and leak detection. Match model lists via the GE Filter Finder; avoid RPWF in RFID units and prefer XWFE/RPWFE for advanced contaminant reduction.
| Series | Notes |
|---|---|
| MWF/MSWF | Legacy fit; no RFID |
| XWF/XWFE | XWFE upgrades XWF; chip variants exist |
| RPWF/RPWFE | RPWFE = RFID chip, higher capacity |
| GSWF/AFPWF | Entry-level compatibility; twist-lock |
| Replacement | Third-party OK if specs match |
Install per manual. Verify RFID status before purchase.
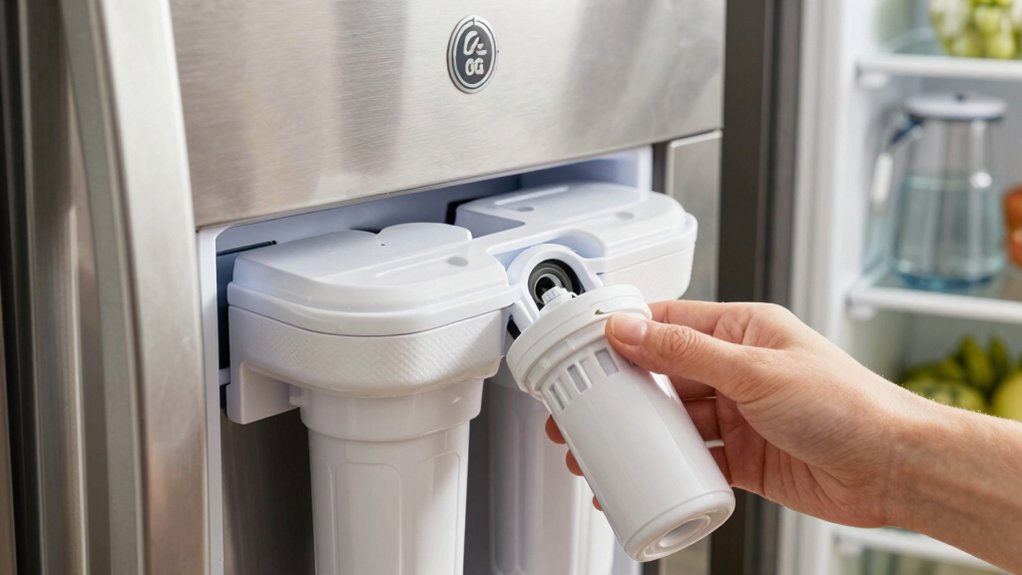
Filter Size & Flow Rates
When you select a GE refrigerator water filter, prioritize the physical size and rated flow rate to guarantee proper fit and water delivery. Filters that match the cartridge housing dimensions and specified gallons-per-minute (GPM) maintain pressure and dispensing speed. You’ll check filter size against the housing to avoid leaks or binding. You should also confirm flow rates to sustain ice-maker and dispenser performance. Match OEM specs (MWF, XWF, RPWFE profiles) or verified third-party equivalents.
- Verify cartridge diameter, length, and connection type for physical compatibility.
- Compare rated flow rates (GPM) to refrigerator requirements to prevent slow dispensing.
Prioritize filters that preserve system pressure for simultaneous ice and water use. Avoid undersized or low-flow replacements that reduce performance or trigger alerts.
Filter Reset Procedure
Locate the filter reset button near the control panel or inside the filter housing so you can access it quickly after a change. After installing a new cartridge, hold the reset button or follow the model-specific key sequence until the filter indicator clears. Run the dispenser to verify flow.
If the light won’t reset, check your model’s reset procedure; inspect the housing and connections; and repeat the sequence until the indicator confirms completion.
Locating The Reset Button
Wondering where the filter reset button is on your GE refrigerator? When locating reset controls, check the dispenser control panel first; most models place the filter reset within the touchpad or behind a small recessed button labeled “Filter” or displayed as a filter icon.
On some French-door and side-by-side units, the filter reset is inside the fresh-food compartment near the upper-right housing or integrated into the ice/water dispenser module. For top- and bottom-freezer models, inspect the control bezel or the interior light housing.
If you don’t see a dedicated button, review the user manual or the GE Filter Finder for model-specific guidance. Keep a small flashlight and needle handy to access recessed buttons without damaging trim or electronics.
Resetting After Replacement
After you replace the cartridge and confirm the dispenser runs without leaks, reset the filter indicator so the control panel accurately reflects remaining life. You’ll follow a short sequence on the control pad or touch display: enter the filter menu, select reset, and confirm.
Timing matters; perform the reset immediately after flushing water flow for several minutes to purge air and trapped carbon fines. If you delay reset timing, the indicator will misreport remaining life and maintenance alerts may trigger prematurely. After reset, verify the indicator reads full life and run the dispenser again to ensure steady water flow and no error codes.
If the indicator won’t reset, consult the manual or contact GE support for model-specific diagnostics.
Reset Procedure For Models
How do you reset the filter indicator on different GE models? Use the fridge controls to complete a filter reset after replacement. For models with a dedicated reset button, press and hold the reset button for 3–5 seconds until the indicator changes or turns off.
On touch-control panels, press and hold the filter reset or water filter icon until the light clears. If your model uses a settings menu, navigate to Filters > Reset and confirm. For basic models without a labeled control, press and hold the Light and Lock buttons together (or consult the manual) to trigger filter reset.
After resetting, run water to verify normal flow and check for any indicator relighting. Record the date of replacement for future maintenance.
Troubleshooting Reset Issues
If the filter indicator won’t reset after you’ve followed the model-specific steps, troubleshoot methodically to pinpoint the cause. First, Verify the filter is fully seated and rotated until it clicks; loose installation often blocks the reset. Check for a bypass plug or protective cap left in place.
Inspect the control panel for error codes and cycle power by unplugging or switching the breaker for 30 seconds. If your model uses a button sequence, repeat it slowly, holding each press the full required time.
Consider two word discussion ideas with support: “power cycle” and “seating check” to guide communication with tech support. If the light still won’t reset, document steps taken and contact GE support for advanced reset troubleshooting and possible control board diagnosis.
Confirming Reset Completion
Want to confirm the filter reset actually completed? Start by running the reset procedure per your model: press and hold the filter/reset button (or energy saver + door for some models) for the specified time until the indicator changes.
After that, verify confirming reset by checking the status light; it should turn off or switch from red/amber to green/blue depending on the model. Next, dispense water for 1–2 minutes to ensure normal flow and no air in lines.
Inspect the display for any remaining alerts and re-run the reset procedure once more if the indicator didn’t change. Document the date of replacement in your maintenance log.
If indicators persist, consult the user manual or contact GE support for firmware-specific steps.
Frequently Asked Questions
Can I Use Third-Party Filters Without Voiding Warranty?
Yes, you can use third party filters, but warranty impact depends on cause. You won’t automatically void warranty just for installing third party filters. Manufacturers typically limit coverage if damage results from non-OEM parts.
Keep proof of proper installation and avoid defects caused by incompatible cartridges. If a filter damages the fridge, GE may deny related repairs. Document installation, use certified alternatives, and contact support if unsure to minimize warranty impact.
How Do I Identify My Refrigerator Model Number?
You find the model number identification on a sticker or plate inside the fridge: it can be located in the upper right or left, behind the crisper, or on the door frame. It may also be found on the back exterior; record the full code.
Compare it with GE resources or the Filter Finder to check compatibility. Documenting the model helps assess warranty impact on filters. Using third-party filters can affect coverage in some cases, so verify terms before installing an alternative.
What Contaminants Does Each Filter Specifically Remove?
You get specific lists of what contaminants each filter removes and their filter efficacy. MWF targets lead, chlorine taste/odor, particulates and VOCs with high efficacy. XWF/XWFE reduce chlorine, taste/odor, sediment and some VOCs via activated carbon. RPWFE handles higher loads of chlorine, particulates, lead and cysts with extended efficacy.
MSWF focuses on chlorine, sediment and taste. Check NSF ratings for exact percent reductions and certified contaminant lists.
Are Replacement Filters Recyclable or Disposable?
Most replacement filters are disposable; you’ll need to handle recycling options and disposal challenges. Many manufacturers don’t accept used cartridges due to mixed materials and contaminant residues.
You can check manufacturer take-back programs, separate plastic housings from carbon media if local recycling accepts them, or use specialized recyclers like TerraCycle. If none exist, seal and discard per local waste rules and document attempts to recycle for compliance.
Can a Bypass Plug Be Used Long-Term?
Yes, you can use a bypass plug long-term, but you shouldn’t. You’ll sacrifice filtration and risk taste, odor, and contaminant exposure. Bypass plug longevity depends on part quality and housing condition.
For long-term bypass safety, monitor for leaks, sediment buildup, and changes in water quality. Replace the plug if damaged. Preferably, install a certified replacement filter or whole-house treatment for sustained protection and compliance.
Conclusion
You’ve seen how the 500 Series filters differ in size, flow rates, and compatibility. You know where the reset button is and the specific reset steps for each model.
After replacing a filter, perform the model-specific reset procedure. If the indicator doesn’t clear, follow the troubleshooting checklist: power cycle, re-seat cartridge, and inspect connectors.
Confirm reset completion by verifying the indicator is off and water dispenses normally before regular use.
You may also like: Ge Refrigerator Water Filters — a related guide worth bookmarking.
You may also like: Refrigerator Water Filter Model Number — a related guide worth bookmarking.
You may also like: Model Number Locations By Brand — a related guide worth bookmarking.