Water Filter Replacement Schedule Template
Use a model-specific replacement cadence: map pitcher, under-sink, whole-house and specialty lifespans to actual gallons and time, and adjust for TDS or heavy sediment. Size cartridges to housing, verify seals and flow rating, and log baseline and operational GPM.
Track differential pressure with calibrated gauges. Inspect inlet screens and valves, and replace or backwash when DP nears spec. Keep dated technician records and trend charts; continue for procedures, troubleshooting steps, and templates.
Quick Overview
- List each filter type (pitcher, under-sink, whole-house) with its typical lifespan range and gallons or months.
- Include fields: installation date, expected end-of-life date, runtime hours, and technician initials.
- Record inlet/outlet pressure and pressure differential at installation and during routine checks.
- Log causes of degradation: sediment, biofilm, hard water; and corrective actions taken.
- Calculate per-filter cost-per-gallon and schedule replacements based on observed differential trends.
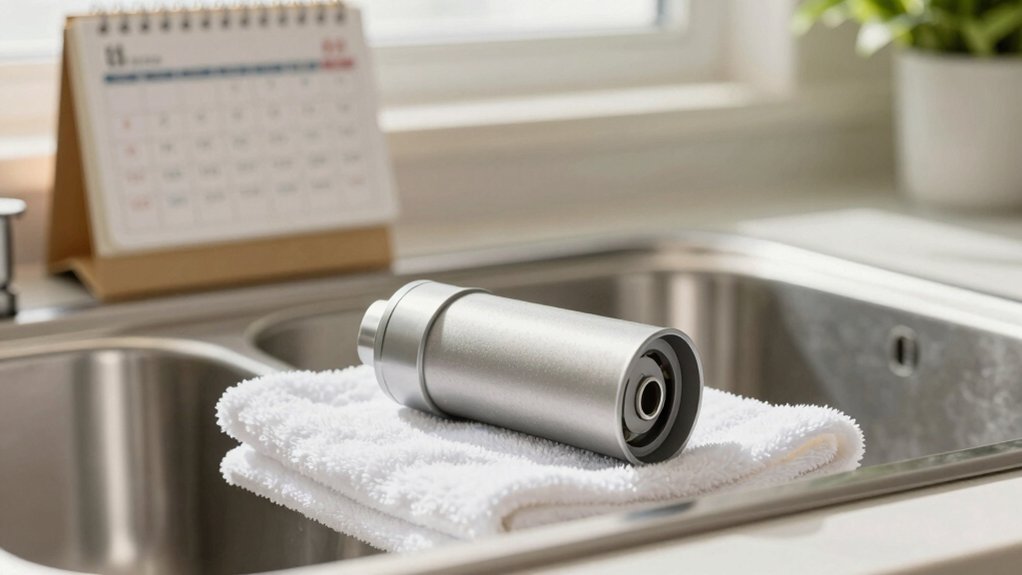
Filter Lifespan by Model
How long should you expect each filter type to last in real-world use? You’ll plan replacement cadence by model: pitchers (40–150 gal, weeks–months), under-sink units (6 months–3 years), and whole-house components (3 months–10 years). Manufacturer guidance and contaminant load dictate timing. High TDS or hard water shortens life.
Use weekly operational checks and maintenance logs to confirm status and trigger replacements. For budgeting, perform a cost comparison across lifespan and per-gallon cost to choose optimal models.
| Model Category | Typical Lifespan |
|---|---|
| Pitcher | 3–16 weeks |
| Under-sink | 6 months–3 years |
| Whole-house | 3 months–10 years |
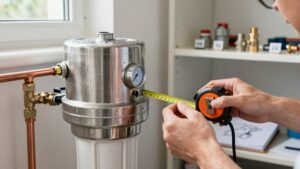
Cartridge Size & Flow Rate
You’ve estimated filter lifespans and maintenance cadence. Now, size and flow specifications determine whether a cartridge will meet your system’s throughput and pressure-drop requirements. You’ll select cartridge size to match housing dimensions and required micron rating while ensuring cartridge compatibility with system fittings and seals.
Calculate nominal and peak flow rates. Then, verify the cartridge’s rated gallons per minute under expected differential pressures. Prioritize flow optimization to avoid premature fouling and to maintain delivery during peak demand. Validate manufacturer flow curves against your system curve and factor in service life reductions at higher flows.
- Match housing, seals, and fittings for cartridge compatibility.
- Use rated GPM vs. system pressure for flow optimization.
- Adjust replacement intervals for peak-flow conditions.
Pressure Drop Troubleshooting
When you see reduced flow, start by confirming the location and magnitude of the restriction with inlet and outlet flow checks. Measure pressure differential across the cartridge with a calibrated gauge to quantify drop. Inspect for common clogs (sediment, biofilm, scale) and verify all valves and gauges are functioning and set correctly.
Use those findings to prioritize actions: clean or replace the cartridge, clear valve blockages, or recalibrate/replace faulty gauges to restore normal flow.
Detecting Flow Reduction
Why is your water pressure dropping suddenly or gradually? You need to isolate a flow issue quickly: check upstream supply valves, inlet screens, and visible leaks. Measure head loss by comparing known baseline flow rates at fixtures; significant deviation signals clogging or collapse.
Inspect cartridges for channeling, compressive failure, or media fines that reduce cross-sectional area. Review lifespan factors: runtime hours, turbidity load, and chemical exposure against manufacturer thresholds to determine end-of-life probability. Replace suspect cartridges and retest flow before investigating pumps or piping.
Document all findings with date, fixture ID, and measured flow values to correlate degradation patterns. Early detection prevents service interruptions and ensures replacements occur on schedule rather than reactively.
Measuring Pressure Differential
A sudden or gradual flow reduction often accompanies an increasing pressure differential across a filter. So after you’ve isolated supply valves and inspected cartridges for channeling or media failure, measure pressure drop to pinpoint the restriction.
Use calibrated manometers or differential pressure gauges across inlet and outlet ports; record static and dynamic readings under normal flow. Compare measured pressure impact against baseline and manufacturer’s maximum allowable differential to determine urgency. If differential approaches limits, accelerate replacement cadence or schedule immediate cartridge change.
Log readings, time, flow rate, and technician initials in the maintenance record for trend analysis. Repeat measurements after replacement to verify removal of restriction. Consistent documentation lets you correlate pressure trends with cartridge age, flow anomalies, and system performance.
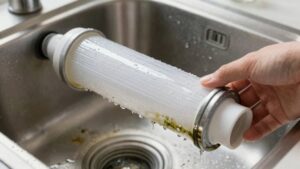
Common Clog Causes
How can you quickly identify the most common causes of clogs that drive pressure drops? Inspect inlet screens, pre-filters, and sediment traps for particulate build-up; a visible cake layer indicates a common clog from suspended solids.
Check for channeling or bypass in pleated cartridges. Irregular flow patterns reduce effective media area and shorten filter lifespan. Measure differential pressure across stages: a rapid rise suggests upstream blockage, while a gradual increase points to media loading.
Evaluate water source changes (construction, seasonal runoff) and biological fouling when turbidity or organics rise. Confirm cartridge seating and O-ring integrity to rule out mechanical restrictions. Document findings against replacement schedule thresholds and manufacturer guidance to decide between cleaning, early cartridge swap, or full media replacement to restore design flow.
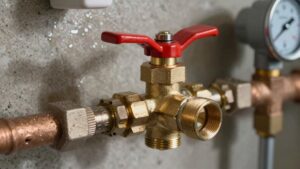
Valve And Gauge Checks
After checking inlet screens, pre-filters, and cartridge seating for common clogs, verify valve positions and gauge readings to isolate pressure drop sources quickly. You’ll perform systematic valve testing: cycle isolation valves one at a time, measure upstream/downstream pressure differentials, and log valve response times. Use handheld manometers and port taps to capture stable readings; note any hysteresis or leaking seals.
Confirm gauge calibration before relying on readings. Compare panel gauges to a calibrated reference and adjust or replace out-of-tolerance units. If pressure loss persists after valves prove sound, document transient events and repeat tests under typical flow conditions.
Maintain a concise log of valve testing results and gauge calibration dates to support troubleshooting and maintenance scheduling.
Restoring Normal Flow
When you encounter a pressure drop, start by isolating the affected zone and confirming flow restrictions with calibrated pressure readings upstream and downstream. This lets you quickly distinguish between valve or gauge issues and filter or piping obstructions. You’ll log readings, compare them to baseline weekly pressure tests, and follow restoration planning protocols that prioritize safety and minimal service interruption.
Inspect filters for loading, check cartridge housings for collapse, and verify valve positions and strainer screens. If the differential exceeds manufacturer limits, perform cartridge replacement per compliance requirements or execute backwash where applicable. After corrective action, re-measure pressures and record results in maintenance logs. Confirm flow restoration to baseline.
Escalate to system assessment if pressure doesn’t normalize after these steps.
Frequently Asked Questions
How Do I Document Replacements for Multiple Stations Efficiently?
Use a centralized digital log to document replacements and achieve multi station efficiency. You’ll assign fixture IDs, record cartridge model numbers, replacement dates, personnel initials, and next-due dates.
Automate weekly checks, pressure and sludge entries, and flag RED status lights for immediate action. Integrate manufacturer intervals and annual test results; generate compliance reports and set alerts for staggered servicing to minimize downtime and ensure consistent preventive maintenance across all stations.
Can I Delegate Weekly Checks to External Contractors?
Yes, you can delegate weekly checks to external contractors, but assess delegation feasibility first. You’ll require strict external contractor oversight: written scopes, checklists mirroring your weekly operational checks, and green-light criteria. Additionally, sludge discharge and pressure test protocols must be included.
Include manufacturer compliance clauses, reporting templates, personnel initials, fixture IDs, and replacement escalation (RED status). Audit contractors regularly; retain annual sampling authority, and document every inspection to preserve compliance and traceability.
What Legal Records Are Required for Compliance Audits?
You must retain compliance records demonstrating audit requirements: dated maintenance logs, replacement receipts, cartridge model numbers, personnel initials, fixture IDs, weekly operational checks and green/red status indicators, pressure and sludge test results, and annual sampling reports with lab certificates.
Manufacturer instructions, owner’s manual excerpts, and contractor agreements should be filed. You’re required to make records searchable, tamper-evident, and available for inspectors within regulatory retention periods.
How Do I Dispose of Used Filter Cartridges Safely?
You should dispose of used filter cartridges by following approved disposal methods and, where possible, cartridge recycling programs. Empty and drain cartridges, seal in labeled containers, and segregate hazardous media per local regulations.
Arrange pickup or drop-off with manufacturers or certified recyclers for cartridge recycling. Document chain-of-custody, replacement dates, model numbers, and personnel initials in maintenance logs to demonstrate compliance and support audit trails.
Are There Warranty Impacts From Third-Party Cartridges?
Yes, using third-party cartridges can affect warranty implications. You’ll need to check the manufacturer’s warranty terms: many void coverage if non-approved parts cause damage. If you can prove the third-party cartridge didn’t cause a failure, you may retain coverage for unrelated defects.
Always document installations, retain receipts, and follow manufacturer specs; doing so minimizes disputes and gives you technical evidence to support warranty claims.
Conclusion
You’ve now got a clear framework to manage filter replacement: track lifespan by model, match cartridge size and flow rate, monitor pressure differential, and troubleshoot clogs methodically.
When you detect reduced flow, measure inlet/outlet pressure, inspect valves and gauges, and isolate common clog causes (sediment, biofilm, scale). Restore normal flow by replacing cartridges; backwashing where applicable; and recalibrating gauges. Follow this schedule and procedures to maintain consistent performance and protect downstream equipment.