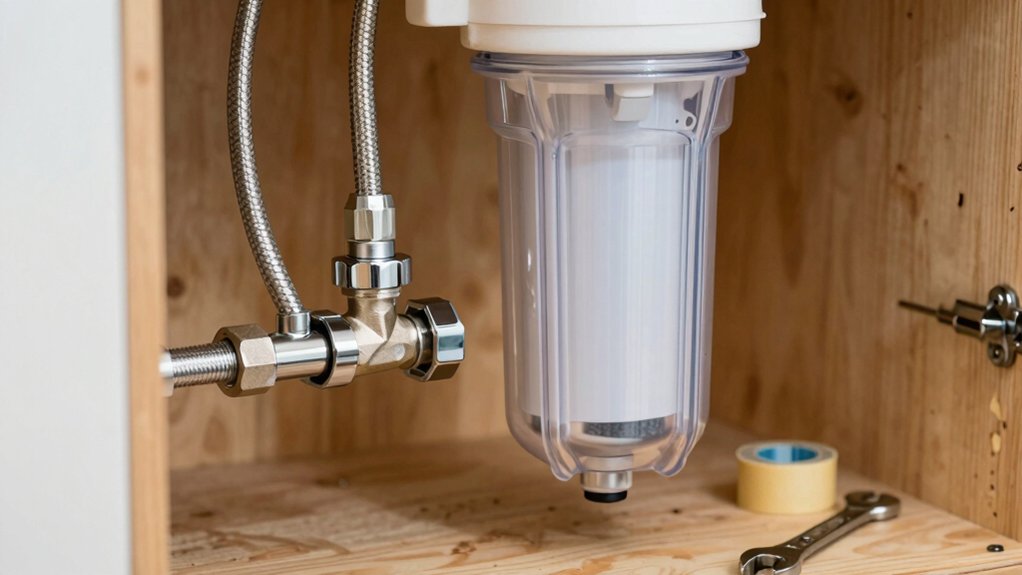
Under Sink Water Filter Installation Basics
You’ll match cartridge dimensions (inner/outer diameters and length) to the housing and confirm micron rating. Standard 2.5″ x 10″ fits most under-sink housings; however, some systems need model-specific cartridges.
Measure vertical space and door clearance. Align bracket to avoid obstructing shutoffs and allow 1–2″ extra for removal and wrench access.
Minimize tubing bends; secure fittings. Then run a controlled pressure/leak test and tighten or replace any faulty connections. Continue for step-by-step setup and troubleshooting.
Quick Overview
- Verify cartridge dimensions (inner/outer diameter and length) match the housing or specified model to prevent leaks and poor sealing.
- Measure available vertical space and add 1 to 2 inches extra for hands and wrench access during cartridge removal.
- Align bracket so the filter clears shutoff valves; this minimizes tubing bends and allows valve operation without removal.
- Perform a controlled leak test: close faucet, open supply slowly, purge air, then hold pressure and inspect all fittings for moisture.
- Mark pilot holes, fasten bracket securely, and ensure easy access for routine maintenance. Compliance with local guidelines is also essential.
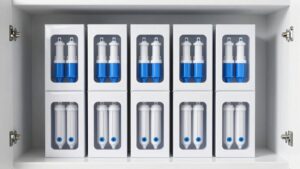
Filter Cartridge Dimensions
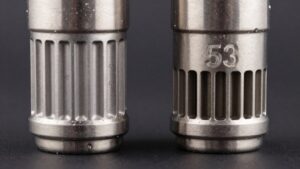
What size cartridge does your system need? You check inner diameter, outer diameter, and length against your housing to confirm cartridge compatibility. Standard 2.5″ x 10″ cartridges fit most under-sink housings, but some systems require model-specific cartridges (UR85, US-600A).
Match dimensions precisely to avoid leaks or poor sealing. Also verify micron rating: filters range 0.1–150 microns; choose lower micron sizes for finer particulate removal but expect faster clogging at higher sediment loads. Measure the mounting clearance (3″ recommended) and ensure quick replacement access.
Below is a quick reference of common dimensions and model guidance to help you confirm fit before purchase.
| Dimension | Typical Value |
|---|---|
| Diameter | 2.5″ |
| Length | 10″ |
| Common models | UR85, US-600A |
| Micron range | 0.1–150 |
Leak Pressure Test Steps
Why start with a pressure test? You need a controlled pressure check to verify sealing and prevent water damage. After completing plumbing connections, follow these precise leak test steps.
- Close faucet, open shut-off valve slowly, and observe supply pressure rise for 1–2 minutes.
- Inspect all fittings, compression nuts, and tubing junctions; feel for moisture and use a towel to catch slow weeps.
- Pressurize the system further by briefly opening the faucet to purge air; then reclosing to hold steady. Monitor pressure behavior for 5 minutes.
- If you detect a leak during the leak test, shut supply, relieve pressure, tighten or replace the faulty fitting, and then repeat the pressure check.
Document results and only proceed if no drops or visible seepage appear.
Mounting Bracket Clearance
Before you fasten the bracket, measure the vertical space to ensure the cartridge clears the cabinet base and the door opens without obstruction. Align the bracket so it doesn’t block shutoff valves and leaves room for hoses and compression fittings.
Position it to permit easy cartridge removal and hose access for maintenance.
Measure Available Vertical Space
How much vertical clearance do you have under the sink to mount the filter bracket and swap cartridges? Measure from the cabinet floor or shelf to the underside of the sink and subtract space for tubing and fittings. You’ll need clearance for full cartridge removal; note cartridge length plus 1–2 inches for hands and wrench access.
Confirm bracket placement won’t interfere with shut-off valves, garbage disposals, or supply lines. Check manufacturer dimensions against available space and verify recycling options for spent cartridges per local guidelines and certification standards for replacement parts. If space is tight, consider offset brackets or shorter cartridges.
Record measurements and mounting height before drilling so installation is precise, serviceable, and compliant with component specifications.
Check Door Clearance
Have you confirmed the cabinet door can open fully without hitting the mounted filter or cartridges? Check door clearance by mounting the bracket temporarily and swinging the door through its full range. Measure the gap between the door and bracket at every angle; you need consistent door clearance to avoid contact during cartridge changes.
Also, verify space behind the cabinet. Some doors have stops or hinges that reduce effective clearance. If the filter protrudes, reposition the bracket lower, closer to the back wall, or offset toward the hinge side to maintain service access. Confirm door hardware doesn’t compress tubing when closed.
Finalize bracket placement only after you can remove and replace cartridges with the door open and fully closed without binding. This prevents damage and ensures reliable routine maintenance.
Align With Shutoffs
Once you confirm the door clears and cartridges can be changed, position the mounting bracket so the filter aligns with the cold-water shutoff and any inline valves. You’ll set bracket height and lateral placement to minimize tubing bends and ensure straight runs to inlet and outlet ports.
Prioritize alignment considerations that preserve service space: leave room to operate the shutoff without removing the filter and avoid trapping valves behind bracket hardware. Verify shutoff accessibility by reaching the valve with standard pliers or fingers and confirming clearance for T-adapter installation. Mark pilot holes; then fasten the bracket so the filter sits stable but removable.
This reduces strain on fittings, shortens tubing runs, and keeps all valves accessible for maintenance and emergency shutoff.
Allow Filter Cartridge Removal
Can you easily slide the cartridge out for servicing? You need to position the mounting bracket so you can allow cartridge removal without maneuvering hoses or tools. Leave vertical and lateral clearance equal to the cartridge length plus 1–2 inches for hand clearance.
Mount the bracket at a height that grants unobstructed replacement access from the cabinet opening; this reduces turning or angling that can stress fittings. Use screws into a solid backing; avoid corners where fingers can’t reach. If space is tight, offset the bracket forward toward the cabinet face to improve access.
Verify you can grip and pull the cartridge straight down or out, depending on the model. Ensure that the head can be unlatched without disconnecting tubing.
Keep Clearance For Hoses
Why leave extra space around the filter head and hoses? You’ll need room to access fittings, swap cartridges, and prevent kinks during hose routing. During clearance planning, measure from the cabinet wall to the filter head plus the hose bundle. Allow at least 3 inches beyond the cartridge diameter and extra length for bends.
Mount the bracket where hoses follow the shortest, straightest path to the shut-off and faucet to reduce stress on fittings. Secure hoses with clips or ties to maintain routing and prevent chafing against cabinet surfaces. Test access by simulating cartridge removal and turning fittings by hand. Good clearance planning minimizes maintenance time; it reduces leak risk from strained connections and preserves consistent flow through the under-sink filter.
Avoid Obstructing Valves
Where should you place the mounting bracket so it won’t block access to shut-off valves and service points? Position the bracket at least 3 inches away from valves, supply lines, and quick-connect fittings so you can reach shut-offs and service points without removing the filter.
Mount high enough to allow cartridge removal and low enough to keep tubing runs short. Orient the bracket so valve handles rotate freely and wrench access remains unobstructed. Mark clearance during the prep step and prefabricate holes if needed.
Don’t accept placements that force you to disassemble plumbing for routine service; those are an unrelated topic to efficient maintenance and create off topic complications. Prioritize accessibility, predictable tubing routing, and unobstructed valve operation for safe, fast service.
Frequently Asked Questions
Can I Use Hot Water With This Under-Sink Filter?
No, you shouldn’t use hot water with this filter. Most under-sink cartridges and seals are rated for cold water only. Hot water usage can degrade filter media; it can warp housing and compromise faucet compatibility.
You should route only the cold supply through the filter and keep the hot line separate. Additionally, confirm manufacturer temperature limits. If you need filtered hot water, install a heat-rated unit or an appropriate inline heater designed for filtered supply.
How Often Should I Change the Carbon Cartridge?
You should change the carbon cartridge every 6–12 months, depending on water quality and usage. Monitor flow rate, taste, and pressure. Replace sooner if you see reduced flow or chlorine taste. Keep records and follow manufacturer specs for capacity.
For maintenance planning, use two word discussion idea1 to compare service intervals and two word discussion idea2 to evaluate cost versus performance; this ensures reliable contaminant removal and consistent output.
Will This Affect My Water Pressure Noticeably?
You won’t notice a significant drop in pressure with a properly sized under sink filter. Modern carbon cartridges cause minimal flow impact when installed correctly.
Expect a small pressure change at high flow rates or with clogged cartridges. Monitor flow after installation, flush new media, and replace cartridges per schedule to avoid increased restriction.
If you see notable pressure loss, check fittings and tubing diameter. Consider a higher-flow cartridge or bypass.
Can I Install Without Drilling a New Faucet Hole?
Yes, you can often install without drilling a new faucet hole. Check install faucet compatibility with your existing dispenser, sprayer, or a multi-hole escutcheon; many filters use those openings.
Measure under sink space constraints to ensure tubing routing and cartridge access. Use appropriate adapters for 3/8″ or 1/2″ valves, secure fittings, and verify clearance. If no spare hole fits, you will need to drill or repurpose an existing opening.
Is Professional Installation Recommended for Warranty Purposes?
Yes, you should consider professional installation if the manufacturer requires it for warranty coverage. A pro ensures correct fittings, proper sealing, and compliant plumbing connections; this reduces leak risk and installation errors that could void warranty.
If you install yourself, follow manufacturer instructions exactly, keep proof of purchase, and document the process. Otherwise, get a licensed installer and retain their receipt to validate professional installation for warranty claims.
Conclusion
You’ve checked cartridge dimensions, measured vertical space, and confirmed door and valve clearances, so the install won’t be cramped or interfere with shutoffs. Mount the bracket where you can remove cartridges and route hoses without bends or kinks.
Perform a leak-pressure test after securing fittings; confirm valves remain accessible. Maintain clearance around valves and hoses for service. Following these steps ensures reliable filtration, safe maintenance, and predictable performance under normal household pressure.