How to Store Drinking Water Long Term at Home
Use food‑grade, BPA‑free HDPE jugs (or glass/stainless) and sanitize them before filling. Treat water with bleach or a purification kit; then fill to the top to minimize air. Label each container with the fill date, capacity, and treatment. Keep an inventory with planned rotate dates.
Store water cool, dark, elevated off concrete, and away from chemicals. Rotate home‑filled containers every 6–12 months, using older water first. Keep going and you’ll find detailed steps and tips.
Quick Overview
- Use food-grade, BPA-free HDPE jugs or glass/stainless containers labeled for potable water.
- Sanitize containers before filling; then treat water (bleach drops or purifier) and wait 30 minutes.
- Fill containers to the top, seal tightly, and label with fill date, capacity, and treatment used.
- Store stored water cool and dark; elevate it off concrete and keep it away from chemicals, fumes, and direct sunlight.
- Rotate and replace home-filled water every 6–12 months. Inspect seals, clarity, and odor during rotation.
-Gallon BPA-Free Jugs
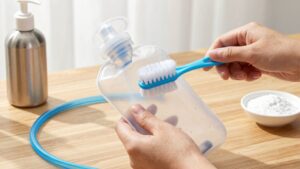
Gallon BPA-free jugs made from HDPE give you a lightweight, durable option for long-term water storage. They resist pressure and won’t leach harmful chemicals. You should sanitize them before use; add a recommended disinfectant or follow a purification kit. Fill them to the top to minimize air, label with the date, and rotate every 6–12 months while keeping them out of direct sun.
Clean, inspect, and replace cracked caps. Use only food-grade, BPA free gallon jugs and store at 50–70°F away from fumes. Treat before sealing: bleach drops per gallon or kit instructions, wait 30 minutes, then top off. Keep off concrete and elevated.
Quick reference:
| Item | Action | Frequency |
|---|---|---|
| Jugs | Sanitize | Before filling |
| Water | Treat | Each fill |
| Storage | Rotate | 6–12 months |
| Location | Cool/dark | Continuous |
Store Date & Capacity
Now that your jugs are sanitized, filled, and labeled, mark the exact fill date and the total capacity on each container so you can manage rotation and usage easily. Record the storage sanitation method used (bleach, boiling, filter) and note the container material—HDPE, glass, or stainless—so you know cleaning limits and shelf expectations. Use a waterproof marker or printed tags that won’t smudge.
- Write fill date, capacity (e.g., 1 gal, 55 gal), and sanitation method on each container.
- Track container material to decide handling: glass needs padding; plastic stays light; steel resists impact.
- Keep a master inventory (spreadsheet or sheet) with totals, locations, and replacement reminders.
This keeps your supply organized. It prevents guesswork and speeds use during emergencies.
Rotate Every 6–12 Months
Rotate your stock every 6–12 months to keep water fresh and safe. Replace home-filled containers at least twice a year. Label each container with the fill date and store them cool, dark, elevated, and away from chemicals. This way, you can use older water first.
Keep a simple tracking system, such as a checklist or calendar, to know when to inspect, sanitize, and refill.
Why Rotation Matters
Why should you swap out stored water every 6–12 months? Regular rotation keeps your supply safe, fresh, and predictable. You’ll prevent taste deterioration, sediment buildup, and slow microbial changes that can occur even in sealed containers.
From a storage logistics standpoint, rotation lets you inspect containers for leaks, odors, or contamination; it ensures seals and labels stay intact.
Make rotation actionable: mark fill dates, move oldest containers to the front, and replace with newly treated water. When you rotate, perform quick quality assurance: check clarity, smell, and container integrity. If anything’s off, disinfect or discard. Use rotated water for cooking or cleaning so nothing goes to waste. A simple calendar reminder makes the process reliable without extra effort.
How Often To Replace
How often should you swap your stored water? Rotate home-filled containers every 6–12 months to keep water fresh and safe. Mark a rotation schedule and use older water first; replenish with treated water from an approved source.
Before refilling, clean and dry containers. Then follow directions on how to disinfect: boil, use proper bleach doses, or follow product instructions so new water starts uncontaminated. Inspect seals and storage locations regularly to spot damage, pests, or pooling. Addressing issues promptly helps prevent contamination.
Store containers off the ground, away from chemicals and heat to reduce risk. To prevent leaks, tighten caps, replace cracked containers, and place trays under barrels. Replace sooner if taste or clarity changes.
Labeling And Tracking
When did you fill that jerry can or barrel? Write the fill date, source (tap, filtered, store-bought), and a planned rotate date on each container. Use simple labeling conventions: waterproof marker on tape, printed tags, and a permanent inventory sheet.
Record tracking metrics: container ID, volume, fill date, rotate-by date, and treatment used. Check labels every 6–12 months during rotation and update the inventory when you replace water. Keep the inventory near storage or in a cloud note so you can access it remotely.
Color-code or tier supplies (daily use, emergency reserve) to speed selection. When you swap water, cross off old entries and add new ones immediately to keep records accurate and reduce waste.
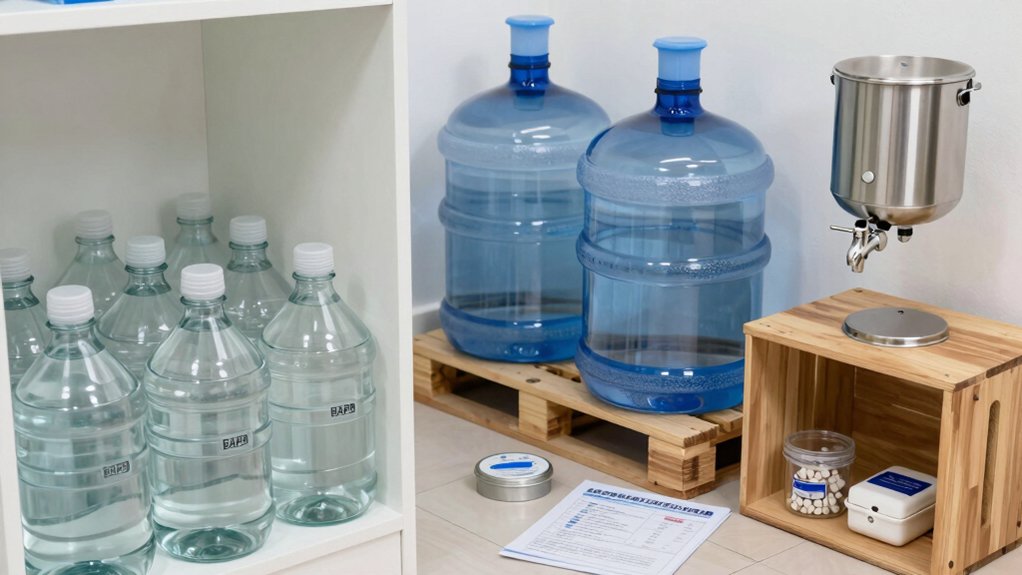
Safe Storage Conditions
Because stored water stays safe longest in a stable, cool, dark place, pick a storage spot that stays between about 50–70°F, out of direct sunlight, and away from heat sources, chemicals, fuel, or strong odors that can permeate containers.
Use only safe materials: food-grade HDPE, glass, or stainless steel labeled for potable water. Keep containers elevated off concrete to reduce temperature swings and moisture contact. Seal lids tightly, label with date, and store away from pesticides or gasoline.
Practice container cleanliness: sanitize per manufacturer instructions, rinse, and air-dry before filling. Fill plastic containers to the top to minimize air.
Check storage quarterly; replace home-filled water every 6–12 months. Move supplies if you detect odors, cloudiness, or damage to containers.
Using Older Water First
Now that your water is stored properly, keep it fresh by using older containers first and replacing them every 6–12 months. Label each container with the fill date and arrange storage so the oldest are at the front.
When you grab water, note the date, reseal tightly, and set the emptied container aside for cleaning. Refill cleaned containers with fresh treated water and move them to the back of the rotation.
Track rotation with a simple checklist or spreadsheet; include container type, capacity, and replacement date. This helps you compare retail pricing when restocking and avoid overbuying. Be mindful of consumer privacy if you share lists online; don’t post exact home inventory or addresses.
Rotate regularly to maintain safe, palatable drinking water.
Frequently Asked Questions
Can I Store Water in Stainless Steel or Glass Instead of Plastic?
Yes, you can store drinking water in stainless steel or glass containers. Stainless steel resists rust, won’t impart taste, and is durable for larger volumes; choose food-grade.
Glass containers are non-reactive and avoid chemical leaching; however, they are heavier and breakable. Sanitize containers before filling, seal them tightly, keep them cool and dark, and label with the date.
Rotate home-filled supplies every 6–12 months and filter or aerate before drinking.
How Do I Disinfect Very Large Barrels Before Filling?
You sanitize very large barrels by following clear disinfection procedures: rinse, scrub with soap, then fill with a bleach solution (4-5 drops unscented 4-6% bleach per gallon scaled to barrel volume) or use manufacturer chlorine tablets. Let sit 30 minutes; then drain and rinse thoroughly.
For large volume sanitation, ventilate, wear gloves, and test residual chlorine before filling. Label cleaned barrels and record the sanitation date for rotation.
Can I Freeze Water for Long-Term Emergency Storage?
Yes, you can freeze water for long-term emergency storage, but use proper freeze solutions and containers to avoid ruptures. Freeze in food-grade, flexible plastic or leave headspace in rigid bottles so ice can expand.
Freezing doesn’t extend shelf life of contamination-free water; however, it prevents microbial growth while frozen. Thaw in a clean area, sanitize if needed, and label with freeze date. Rotate or test every few years.
What’s the Best Way to Transport Stored Water Safely?
You should use food-grade, sealed containers and secure them to prevent spills; that’s the best way to transport stored water safely. Use sturdy handles, ratchet straps, or bungee cords to fasten bulk containers in vehicles. Keep them upright and pad glass or metal to avoid breakage.
Avoid trunk heat and keep containers away from chemicals. Carry smaller filled bottles for easy access. Label them and check seals before travel.
How Do I Test Stored Water Quality at Home?
Test stored water by using testing methods like home test strips, TDS meters, and bacteriological kits. Follow kit instructions and compare results to safety standards.
Check quality indicators: clear appearance, no odor, normal taste, and acceptable TDS/pH levels. If results fail, disinfect or replace water.
Consider transport considerations: sample in clean containers, avoid contamination during collection, and seal samples tightly if you send them to a lab for confirmation.
Conclusion
You’ve got the right basics: use BPA-free gallon jugs, note the fill date and capacity, and store them in a cool, dark spot away from chemicals.
Rotate supplies every 6–12 months so older water gets used first. Replace any container that’s bulging, cloudy, or smells off.
Label each jug clearly and keep a simple tracking list. With these steps, your household will have safe, usable drinking water when you need it.