Where to Install a Whole House Water Filter in Plumbing
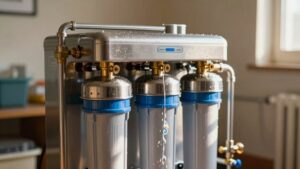
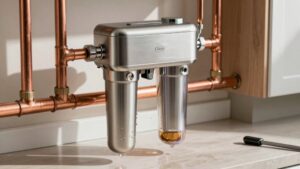
Install the whole-house filter on the main cold-water supply just after the pressure tank or water meter so it protects every fixture and stays on solid backing. Mount it high enough for cartridge removal and gauges; allow 12–18 inches above and 18–24 inches below. Position a three-valve bypass and isolation ball valves close to the inlet for easy service, drainage, and winterization.
Keep unions or threaded connections accessible. Continue for sizing, valve selection, and winter prep.
Quick Overview
- Install the filter after the main shut-off and pressure tank (or city meter) so whole-house water is treated and isolated.
- Size the filter housing and media for sustained service flow (GPM) based on residents and peak simultaneous use.
- Mount the unit at eye-level with 12–24 inches clearance below and 12–18 inches above for cartridge changes and wrenching.
- Place a three-valve bypass (two isolations and one bypass) adjacent to the filter inlet for quick reroute and winterization.
- Include a capped drain or drain port, foam insulation, and labeled valves nearby for winterization and leak detection access.
Whole-House Filter Sizing Chart
Where should you start when picking a whole-house filter? You begin with a sizing chart that matches residents, bathrooms, and peak simultaneous use to required flow rates. Use the chart to choose a filter or parallel units so you avoid pressure drop and shortened media life. Gather inputs: residents, bathrooms, peak uses, and well/city supply.
| Input | Recommended GPM |
|---|---|
| 1–2 residents | 5–7 GPM |
| 2–4 residents | 7–12 GPM |
| 5–6 residents | 10–18 GPM |
| 9–10 residents | 12–20 GPM |
Then select media and housing sized for sustained service flow (GPM); not just peak. Test actual supply flow; allow brief peaks; and prefer slightly higher sustained capacity to maintain pressure and longevity.
Installation Height & Clearance
After you size the system, pick an installation height that lets you change cartridges, access gauges and valves, and mount the unit securely without strain. You’ll position the filter so cartridge removal clears the floor and you can reach gauges comfortably. Plan for at least 18–24 inches of clearance space below and 12–18 inches above for wrenching and replacement. Mount to a solid backing at a height that keeps inlet/outlet fittings level with existing plumbing and avoids awkward bends.
- Visualize cartridge removal with a bucket underneath.
- Picture gauge faces at eye level for quick checks.
- Imagine valve handles turning without kneeling.
- See a service tech standing upright during maintenance.
Choose installation height to optimize access, safety, and secure mounting.
Bypass Valve Placement
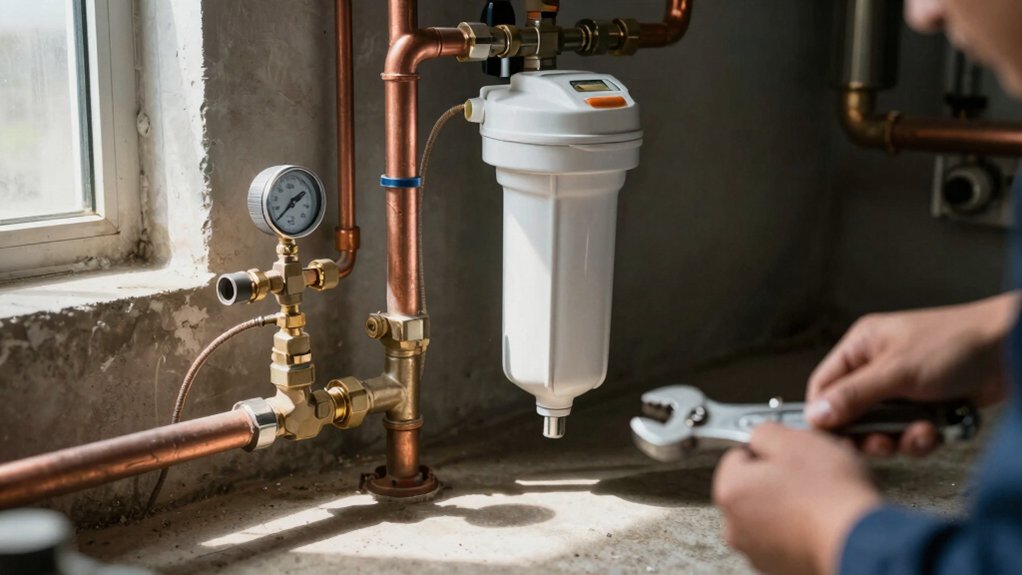
Place the bypass valve close to the filter inlet so you can reroute water quickly during service or winterization. Choose a durable three-way or dual-isolation ball valve and ensure there is clear access and enough clearance for tools and hose connections.
Integrate isolation valves on both sides of the bypass and orient piping to prevent pockets that trap water when you need to winterize.
Bypass Valve Location
Why install a bypass valve near your whole-house filter? You position it where bypass valve placement supports quick isolation and service without shutting down the entire house. Place the bypass adjacent to the filter housing, after the main shut-off and before branch splits, so you can reroute flow during cartridge changes.
Mount the assembly at a convenient height and secure it solidly to the wall or plywood backing. Design the piping to allow isolation valve integration: include dedicated isolation valves on both filter inlet and outlet so you can close them, open the bypass, and maintain pressure to the rest of the house.
Leave clear working space for tools, test for leaks, and verify post-install pressure before finishing. Comply with local code.
Valve Type Options
You’ve already seen why locating the bypass next to the filter and after the main shut-off makes service simpler. Now consider which valve types work best for that arrangement. Choose ball valves for the primary isolation and bypass; they’re durable, provide full flow, and show open/closed position clearly.
Use a three-valve bypass (two isolation, one bypass) with quarter-turn ball valves for fast service and minimal leakage risk. For tight spaces, a single-handle diverter valve can save room but may limit flow and complicate repairs. Avoid gate valves for routine servicing since they’re slower and harder to confirm closed.
Ensure valve type matches pipe material and pressure rating. Install union or threaded connections for easy replacement without disturbing surrounding plumbing.
Access And Clearance
How will you access the bypass valve for routine service or emergency shutoff? Place the bypass where you have clear access clearance around fittings and can reach controls without tools. Mount the valve at a comfortable valve height: typically between waist and chest level so you can operate it quickly and inspect seals during filter changes.
Leave 6–12 inches of unobstructed space on all sides for wrench use and leak checks. Secure the assembly to a solid backing to prevent strain on joints when you actuate the bypass. Avoid tight corners, stacked equipment, or behind shelving that hampers access.
Confirm the chosen spot still sits near the main supply and before branch splits so the bypass serves its maintenance and emergency function effectively.
Isolation Valve Integration
Where should you place the bypass valve so it actually functions during maintenance and emergencies? Place the bypass adjacent to the filter housing, between the filter inlet and outlet, and as close to the main shut-off as practical. That location lets you isolate the filter without shutting off the whole house.
Use an isolation valve on each side of the filter and a three-way bypass or paired ball valves to create a true bypass line. Integration considerations include clear labeling, accessible mounting height, and robust connections to withstand frequent operation. Ensure valves match pipe diameter and pressure ratings, and verify valve orientation for easy operation.
Test the bypass under pressure after installation and include it in routine maintenance checks to confirm reliable emergency use.
Winterization Considerations
Preparing your bypass valve placement for winter means positioning it so you can quickly drain or isolate the whole-house filter without exposing piping to freeze damage. You should locate the bypass near the main shut-off and at a height that lets water drain away from the filter body and fittings.
Install a drain port or capped tee on the isolated side so you can purge water during winterization. Ensure clear access for operating the valve while adding foam pipe insulation around adjacent runs to maintain winterization readiness. Mount the valve on a stable backing to prevent movement when you attach insulation.
Label the bypass and document the drain procedure so you can perform controlled winter shutdowns without risking frozen pipes.
Leak Detection Access
Why place the bypass valve where you can see and reach it quickly? You want immediate control during a leak detection event and clear access clearance for tools and inspection. Install the bypass near the main shut-off and at a comfortable height so you can operate it and observe fittings without moving boxes or climbing.
Visible placement speeds response, limits water damage, and lets you verify seals after maintenance. Maintain a clear workspace; anchor the valve assembly to studs or a plywood backing so it stays aligned during use. Label the valve and leave 12–18 inches of unobstructed clearance for gauges, hoses, and a moisture sensor if you add one. Properly placed bypass valves improve safety, serviceability, and early leak detection.
Frequently Asked Questions
How Often Should Filter Cartridges Be Replaced in a Whole-House System?
You should replace filter cartridges every 3–12 months depending on usage and water quality. For replacement frequency, check pressure drop and flow rate monthly; replace sooner if you notice reduced pressure, discoloration, or odors.
Maintenance tips: keep a spare set, record change dates, flush housings during swaps, and install a bypass valve to avoid downtime. Follow manufacturer guidance and local codes to ensure optimal performance and water safety.
Can a Whole-House Filter Remove Lead and Heavy Metals Effectively?
Yes, you can reduce lead and heavy metals with the right whole-house system. You’ll need certified lead reduction media (e.g., catalytic carbon, KDF, or specialized resin) and corrosion control measures to limit ongoing pipe leaching.
Install pre-filters and maintain recommended flow/pressure so media works effectively. Test water before and after; replace cartridges per manufacturer; and follow local codes to ensure sustained heavy metal removal and corrosion control.
Will Installation Affect My Water Heater Warranty or Insurance?
Yes, installation impact can affect your water heater warranty and insurance, depending on how you install it. Check warranty considerations before cutting pipes or modifying the heater plumbing. Improper connections, lack of permits, or damage during installation can void warranties and complicate claims.
Use manufacturer-approved materials and follow local codes. Keep receipts and document professional installation. Inform your insurer and provide proof to avoid coverage disputes.
Do Whole-House Filters Require Electricity or Moving Parts?
Most whole house water filtration systems don’t require electricity or moving parts; they rely on passive filters and water pressure. You’ll encounter mechanical filters, carbon cartridges, and sediment housings that work without power.
Some advanced systems, such as UV sterilizers, electronic conditioners, or backwash-capable softeners, do need electricity and pumps or valves. Check product specs so you’ll know if installation demands wiring, timers, or motorized components for proper operation.
How Do I Sanitize the System After Filter Changes?
You sanitize the system after filter changes by following clear sanitization steps in a post change routine.
Shut off water, open faucets to drain, and remove the new filter housing cap. Add manufacturer-recommended bleach solution to housing or feed reservoir. Reassemble, then slowly restore water to fill and circulate for 10 to 30 minutes.
Drain again, flush all taps until the chlorine smell is gone, and test water. Record date and observations.
Conclusion
Place your whole-house filter where you’ll get easy access for cartridge changes and maintenance. This is usually after the main shutoff and water softener; it should be before branch lines. Install it at a comfortable height with clearance for removal. Additionally, add a bypass and isolation valves for service, and choose valve types that match your plumbing.
Position leak-detection and winterization access nearby. By planning placement, clearance, and valves up front, you’ll simplify maintenance, prevent downtime, and protect your system year‑round.
You may also like: Water Filter Bypass Valve Purpose — a related guide worth bookmarking.
You may also like: Whole House Water Filter System — a related guide worth bookmarking.