Whole House Filter Shopping Checklist
When shopping for a whole-house filter, start by testing your water so you can match micron ratings and media to your contaminants.
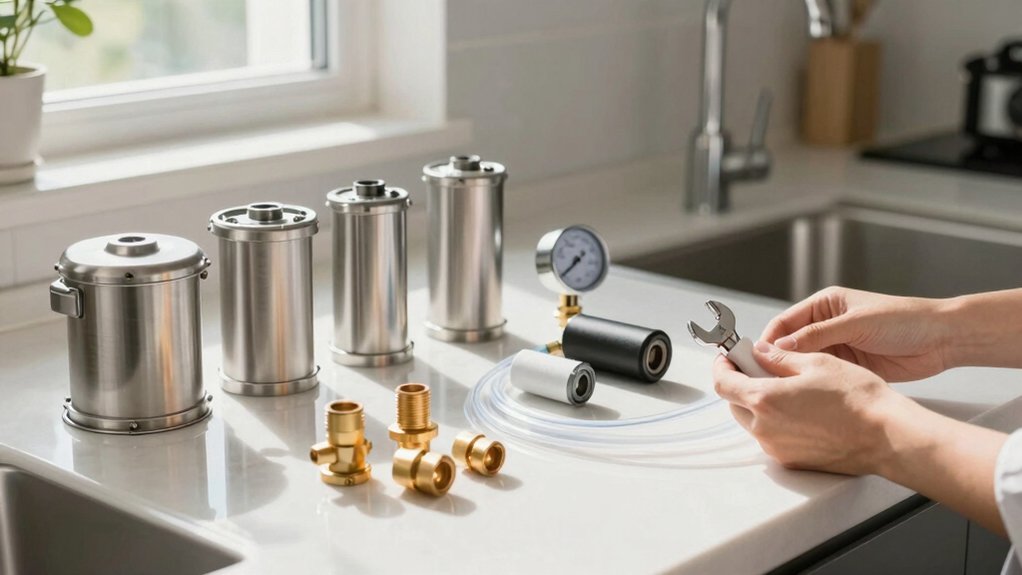
Choose a sediment pre-filter (coarse 50–100 μm to 5 μm) ahead of carbon or specialty tanks to protect media and control pressure drop.
Sketch flow and site layout, size piping to maintain pressure, add a full-bore bypass with service valve positions, and plan electrical/GFCI and drain routing for easy maintenance.
Keep going to get step-by-step setup and sizing tips.
Quick Overview
- Test your water for particulates, chlorine, iron, hardness, and microbes to define required filter types and micron ratings.
- Start with a sediment pre-filter sized to expected turbidity. Use the highest micron that meets goals to minimize restriction.
- Choose carbon/KDF media based on target contaminants: chlorine, VOCs, chloramines. Balance flow rate with media life.
- Plan piping, bypass valves, and clear service access: label flow direction, provide full-bore bypass, and allow cartridge/tank clearance.
- Verify electrical, drain, and code requirements: GFCI/proper grounding, correctly sized gravity or pumped drain, and local compliance.
Micron Rating Comparison Chart
Why choose the right micron rating? You need precision: the micron rating dictates what particles get trapped and how much flow restriction you’ll accept. Lower micron ratings (absolute vs nominal) capture finer contaminants but increase clogging and reduce flow.
Match rating to source and purpose: coarse 50–100 μm pre-filters protect downstream stages; 5 μm nominal suits general sediment removal; 0.5–1 μm absolute targets bacteria. Consider replacement frequency and expected turbidity to avoid excessive pressure drop.
| Rating Range | Typical Use |
|---|---|
| 50–100 μm | Coarse pre-filtration |
| 5 μm (nominal) | Standard household sediment |
| 0.5–1 μm (absolute) | Drinking/microbial protection |
Choose the highest micron that meets contaminant goals to minimize flow restriction and maintenance.
Sediment Vs Carbon Checklist
After choosing the right micron rating for sediment control, you need to decide whether a dedicated sediment stage or an activated carbon stage (or both) best meets your home’s contaminant profile and flow/maintenance constraints. You’ll weigh particle removal versus chemical adsorption; matching media selection to source water is essential. Sand/rust needs depth/pleated sediment; chlorine, VOCs, and taste issues need activated carbon.
Consider pressure drop, service interval, and replacement cost when combining stages.
- Test water for particulates and chlorinated compounds to prioritize sediment vs carbon.
- Use sediment first to protect downstream carbon and extend media life.
- Select carbon type (granular, catalytic, coconut) based on target contaminants.
- Balance flow-rate specs with cartridge or tank media longevity and maintenance.
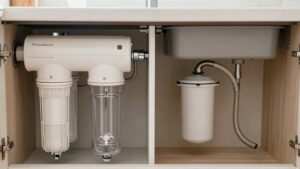
Installation Flow Diagram
Before you order hardware, map the installation flow: inspect the site for access and pressure constraints, sketch the piping layout with connection sizes, and mark the preferred filter unit placement. Include a clearly labeled bypass valve configuration and route electrical and drain lines to code-compliant locations.
That diagram will prevent sizing errors, simplify installation, and speed future maintenance.
Pre-Installation Site Assessment
Which locations in your home will affect installation and long-term performance? Inspect entry points, utility rooms, garage, and basement for space, access, and ventilation. Note noise considerations: pick a location that isolates pump or backwash sound from living areas. Verify floor load capacity for tank-based systems and clearances for service access and media replacement.
Check nearby drains and electrical outlets; you’ll need reliable power and a properly graded drain for regeneration or backwash cycles. Assess temperature exposure: freeze risk damages cartridges and tanks.
Plan for aesthetic integration by locating systems out of direct sight or using enclosures and mounting brackets to minimize visual impact. Document measurements, obstructions, and service routes before creating the installation flow diagram.
Piping Layout Diagram
Where will the main shutoff, pre-filters, softener/backwash unit, and service bypass sit in your pipe run? You’ll draft a piping layout showing inlet, shutoff, sediment pre-filter, carbon or media tanks, softener/backwash with drain, and outlet to the home. Place the main shutoff upstream of filters for safe isolation. The bypass valve should be downstream of the softener so you can route water around treatment during service.
Mark service ports, union connections, and pressure gauge locations at inlet and outlet. Size piping and fittings to match system flow rate to avoid pressure loss. Include clear labels for flow direction, valve positions for normal and bypass modes, and accessible spacing for maintenance and backwash discharge.
Filter Unit Placement
How should you arrange each filter unit to optimize performance, access, and serviceability? Position pre-treatment (sediment) first, then carbon/KDF stages, then any specialty tanks to maintain proper flow sequence and protect downstream media.
Mount units on a stable wall or bracket at a placement location that keeps inlet/outlet piping straight to minimize pressure loss. Leave 18–24 inches of clearance in front for cartridge removal and 6–12 inches above for connections. Guarantee surrounding accessibility on both sides for valves and gauges. Label flow direction and service points on the manifold.
Keep electrical controls and pressure vessels separate but reachable. Verify that the chosen placement location accommodates required connection sizes and meets local code for shutoffs and drain lines.
Bypass Valve Configuration
Now that your filter units are placed for serviceability and straight piping, add a bypass valve manifold to let you isolate the system without shutting off household water. Design the manifold with clear flow paths: inlet, service (through filters), and bypass.
Use a diagram showing normal flow through filters and an alternate bypass line for maintenance. Specify bypass valve material compatible with potable water and system pressure: brass or stainless steel are typical to minimize corrosion and maintain bypass valve cleanliness.
Install ball valves with full-bore ports and position handles for unambiguous open/closed orientation. Include locking provision or tags for service states. Size connections to match the main line to avoid pressure loss. Label piping and validate leak-free operation before commissioning.
Electrical And Drain Routing
Which routes will keep your electrical and drain connections safe, code-compliant, and easy to service? Plan an installation flow diagram that shows clear separation between wet and electrical pathways, dedicated conduit runs for power, and labeled access points. Route power to the controller with a GFCI-protected circuit and verify electrical grounding at the service panel and equipment chassis.
Position the drain line to minimize gravity runs. Confirm drain sizing and slope meet local code and the appliance’s wastewater rate. Group valves, taps, and service clearances in one accessible bay so you can isolate, test, and replace modules without disrupting the whole system. Mark all lines on as-built drawings and include cable trays, conduit sizes, and drain sizing notes for future service.
Frequently Asked Questions
Do I Need a Separate Filter for My Refrigerator Water Dispenser?
You don’t necessarily need a separate filter for your refrigerator water dispenser if your whole-house system provides refrigerator compatibility and delivers certified dispenser filtration at adequate pressure and flow.
Verify your fridge’s manufacturer requirements, connection size, and whether your whole-house filter removes the contaminants you care about (chlorine, lead, PFAS). If it lacks targeted removal or pressure, install a dedicated refrigerator filter or inline dispenser filtration for prime taste and safety.
Can a Whole-House Filter Remove PFAS Effectively?
Yes, a whole-house filter can remove PFAS, but it depends on the media and design. You’ll want systems using granular or powdered activated carbon, ion exchange, or specialized PFAS-targeted resins; these offer higher PFAS removal and measurable filtration efficiency.
Tank-based, high-capacity setups usually perform better than small cartridges. Test your water, check lab-verified removal rates, and match flow/pressure specs to maintain the stated PFAS removal and long-term efficiency.
How Often Should Filter Media Be Professionally Tested?
How often should filter media be professionally tested? You should have filter media professionally tested every 1–3 years, depending on water source, contaminant load, and system type.
High-risk wells or known PFAS/VOC issues need annual testing. Municipal systems with low contaminant levels can extend to 2–3 years.
Professional tests verify media performance, breakthrough, and capacity. They also guide timely media replacement or regeneration to maintain treatment effectiveness and protect plumbing and appliances.
Will Filtration Affect My Water Heater Warranty?
Yes, will filtration affect my water heater warranty? It can. Installing a whole-house filtration system that alters flow, pressure, or water chemistry may void warranty terms if it causes damage.
You should check the water heater manual and warranty specifics. Keep installation records, use approved fittings, and maintain manufacturer-recommended operating pressure and temperature. Notify the heater manufacturer or installer before fitting systems that considerably change water characteristics to avoid warranty disputes.
Can I Install a Whole-House Filter in an RV or Tiny Home?
Yes, you can install a whole-house filter in an RV or tiny home if you size and mount it properly. Consider RV considerations like 12–125 PSI range, limited space, 1″ NPT fittings, and secure vibration-resistant mounting.
For tiny home portability, choose compact, tank-based or cartridge systems with 7–15 GPM and quick-disconnects. Test the water source, confirm flow needs, and allow access for media or cartridge changes and winterizing.
Conclusion
You’ve covered the essentials to choose and install a whole-house filter system. Use the micron chart to match contaminants, pick sediment or carbon based on particle vs. chemical removal, and follow the installation flow diagram and piping layout for efficient placement.
Confirm bypass valve access, electrical and drain routing, and complete a pre-installation site assessment. With these practical checks, you’ll ensure correct filtration performance, maintainability, and safe, code-compliant operation.
You may also like: The Right Water Filtration Type — a related guide worth bookmarking.