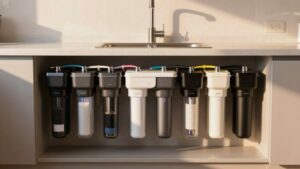
Well Water Filtration Basics Sediment Iron Sulfur Bacteria
You should size prefilters to the sediment PSD: use D50 to pick 5–10 µm upstream for silt or 10–20 µm for coarser sand.
Stage iron/sulfur removal; oxidation + greensand or catalytic carbon, then carbon polishing, and disinfect last: UV or chlorination to protect downstream plumbing.
Match cartridge life to influent: sediment 3–12 months, carbon 6–24 months. Confirm pump/piping pressure ratings and set pressure switch/tank precharge correctly. Follow surge/relief specs to prevent damage, and keep going for system specifics.
Quick Overview
- Test well water for particle size distribution (PSD), iron, manganese, hydrogen sulfide, and bacteria before selecting treatment.
- Match sediment prefilters to measured D50: Use 5–10 µm for silt (≈21 µm D50) or 10–20 µm for coarser PSD.
- Remove iron and manganese with oxidation (air/permanganate) plus greensand or manganese oxide media. Follow this with backwashing and polishing carbon.
- Treat sulfur (H2S) with aeration, catalytic carbon, or oxidizing media sized for influent concentration and flow.
- Address bacteria with chlorination, UV disinfection, or continuous chemical feed. Maintain contact time and replace UV lamps annually.
Sediment Particle Size Chart
Why does particle size matter for well-water sediment control? You need sediment PSD to select effective prefiltration: D50 relevance tells you the median grain size driving clogging and transport. If D50 sits near silt (≈21 µm), you’ll use 5–10 µm stages. Coarser D50 shifts you to 10–20 µm upstream screens. Match micron ratings to PSD to minimize pressure drop and extend service life.
| Particle Category | Typical Size (µm) |
|---|---|
| Clay/Silt mode | 1–21 |
| Fine sand | 63–250 |
| Medium/coarse sand | 250–1000 |
| Gravel/cobble | >2000 |
Use measured PSD and D50 to size cartridges, pack screens, and set staged filtration thresholds.
Filter Change Interval Chart
How often should you change each filter in a well-water system depends on filter type, influent quality, and household demand. Use a clear interval chart based on these variables to schedule replacements and avoid performance loss. You’ll map expected lifespans (months or gallons) for each filtration media: 5-micron sediment prefilters, KDF/granular media, activated carbon, and UV lamp service.
Base intervals on measured turbidity, iron/sulfur load, and flow volume. Track maintenance frequency in a log and adjust intervals when breakthrough or pressure drop occurs. Include conservative margins for critical stages to protect downstream components.
- Sediment prefilter: 3–12 months (or per 1,000,000 gal guideline)
- KDF/mineral media: 2–5 years
- Carbon block: 6–24 months
- UV lamp: annual check/replacement
Well Pump Pressure Limits
You need to confirm your pump’s maximum pressure rating before adjusting system settings to avoid overloading the unit or voiding warranties. Set the pressure switch and tank precharge within the pump and pressure tank limits. Verify that your piping and fittings are rated above the system’s cut-out pressure.
Also, install a correctly sized relief valve and ensure pipe pressure ratings exceed the combined pump cut-out and potential surge pressures.
Pump Maximum Pressure
What pressure should your well pump be set to guarantee safe, efficient operation? You need to respect the pump maximum rating stamped on the pump housing and the manufacturer’s documentation. Exceeding that pressure risks seal failure, motor overload, and premature wear.
Set your system so the pressure tank and fittings operate below that maximum, and size pressure relief valves accordingly. Coordinate pump maximum with pressure switch settings to prevent cycling into unsafe ranges. Do not use the switch alone as a safety limiter.
Verify pump curves and local code for allowable working pressures, and confirm all components (tank, piping, valves) have compatible pressure ratings. Test the assembled system under load and record operating pressures to ensure long-term reliability and safety.
Pressure Switch Settings
Although pressure switches are simple devices, setting them correctly is critical to protect the pump, pressure tank, and plumbing from overpressure and excessive cycling. You’ll set cut-in and cut-out pressures based on pump capacity and system design: a common residential pair is 30/50 psi, but higher-rated pumps may use 40/60 or 50/70.
Verify the pump’s maximum pressure and service factor before selecting settings to avoid exceeding manufacturer limits. Adjust deadband to reduce short cycling; a wider differential lowers cycle frequency but increases drawdown. Use a calibrated pressure gauge and locknut procedure to make precise adjustments.
Proper pressure switch settings are a straightforward, high-impact step in well pump optimization and longevity.
Pressure Tank Limits
Adjusting the pressure switch is only part of preserving system health; the pressure tank sets the real limits on pump cycling and safe operating pressure. You must size the well tank to match pump flow and drawdown requirements so the pump runs minimally and avoids short-cycling.
Check precharge pressure, which is usually 2 psi below cut-in, and adjust with a reliable gauge. Monitor bladder integrity. A ruptured bladder reduces usable volume and forces more frequent starts. Watch for vent noise near the tank or well cap, indicating air leaks or improper venting that can destabilize tank pressure.
Install a pressure gauge and cycle counter to document performance. Replace tanks that show rapid pressure loss, excessive cycling, or persistent vent noise to protect pump lifespan.
Pipe Pressure Ratings
Why should you match pipe pressure ratings to your well pump’s maximum output? You ensure system integrity and safety by aligning material ratings with the pump’s peak pressure. Calculate the pump’s shut-off and operating pressures. Then select piping and fittings rated above that maximum, allowing a safety margin per local code.
Use pressure ratings stamped on pipes and confirm compatibility with valve standards for isolation and check valves. Pay attention to transient pressures: water hammer can exceed steady-state values. Choose components that tolerate short spikes. Install pressure-rated unions and supports to prevent stress. Document rated values and maintain inspection records.
Matching ratings minimizes leaks, rupture risk, and premature component failure while keeping the filtration system reliable.
Relief Valve Requirements
Matching component pressure ratings to your pump’s maximum output also means you need a properly specified relief valve to protect the system from overpressure events. You must select a relief valve that opens below the weakest component rating and above normal operating pressure; this complies with local codes and manufacturer limits.
Size the valve for full pump flow to prevent pressure spikes during pump start or malfunction. Use valves rated for potable water and compatible materials to avoid corrosion from iron or sulfur-laden supplies. Install the valve where it can safely discharge to a drain or outdoors; it must be vented per code.
Inspect and test the relief valve periodically. Document setpoint, flow capacity, and service intervals to satisfy relief valve requirements and maintain pressure surge protection.
Pressure Surge Protection
How do you protect your well system from damaging pressure spikes? You install pressure surge protection components and set well pump pressure limits to safeguard pumps, tanks, and filtration stages. Fit a pressure relief valve sized to system flow and locate it near the pressure tank; test annually.
Add a pressure transducer or snubber to the pressure switch to damp rapid changes and prevent false cycling. Use a secondary surge arrestor or accumulator tank where long pipe runs or check valve closures produce hydraulic shock. Configure cut-in and cut-out pressures per pump specifications and include a pressure gauge for verification.
Maintain and inspect fittings, valves, and electrical controls to ensure pressure surge events stay within safe limits.
Frequently Asked Questions
Can I Drink Well Water Without Filtration After a Boil Advisory Lifts?
You can drink well water after a boil advisory lifting only if testing confirms microbial safety. Boiling doesn’t remove chemicals or heavy metals. After the advisory lifts, sample your water for bacteria, nitrates, and metals; follow public-health guidance.
If tests are clear, you’re fine for drinking. If contaminants persist, install appropriate treatment: UV for microbes, KDF/carbon for metals/odors, sediment prefilters before resuming regular consumption.
How Does KDF Media Affect Household Water pH?
KDF media typically shifts water pH slightly toward neutral by promoting redox reactions. You’ll see small increases or decreases depending on source water chemistry.
In well water filtration, KDF media exchanges electrons to reduce iron, chlorine, and some metals. This can alter alkalinity and thus water pH marginally.
After a boil advisory, you shouldn’t rely on pH change alone. KDF helps treatment but doesn’t replace disinfection or comprehensive testing.
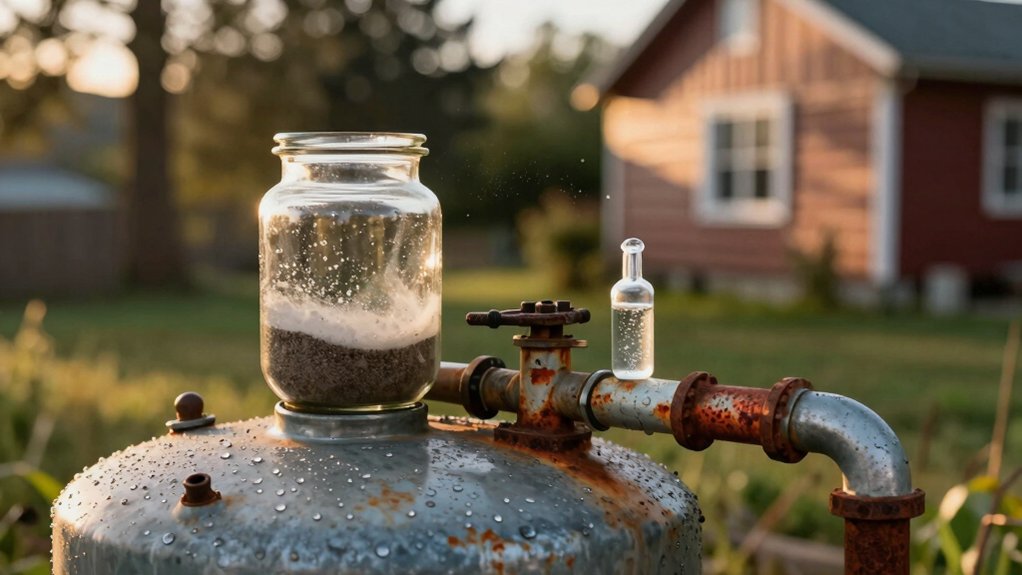
Will Sediment Filters Remove Visible Rusty Colored Stains?
Yes, sediment filters will remove visible rusty-colored stains caused by suspended iron particles. You’ll capture iron-laden sand, silt, and rust with a 5-micron prefilter before it reaches fixtures.
For dissolved iron that stains, sediment alone won’t help; you’ll need KDF or oxidation and filtration downstream. Two word ideas: particle capture.
Discussion topics: prefiltration placement, micron rating, maintenance intervals, and compatibility with downstream iron-removal stages.
Can UV Systems Harm Beneficial Minerals in My Water?
No, UV systems won’t harm beneficial minerals in your water. UV safety relies on ultraviolet light to inactivate microorganisms without changing water chemistry; thus, mineral preservation is maintained. You’ll retain calcium, magnesium, and trace elements because UV doesn’t filter or ionize dissolved solids.
For optimal performance, pair UV with sediment prefiltration to prevent fouling and ensure consistent disinfection while preserving water’s mineral content and overall quality.
Do Whole-House Systems Require Professional Installation?
Yes, whole house systems often need an installation professional for proper performance and code compliance. You’ll ensure correct placement at the water entry, proper prefilter integration, pump and pressure-tank coordination, and leak-free connections.
A professional sizes components, configures multi-stage media (sediment, KDF, carbon, UV), and tests flow/pressure and bacteriological safety. DIY can work for simple setups; however, complex systems benefit from certified installation professionals to avoid failures.
Conclusion
You’ve now got the core specs to keep your well system reliable: match sediment filters to particle sizes, follow filter change intervals, and respect pump pressure and tank limits. Set pressure switches and relief valves per manufacturer ratings; use pipe and surge protection that tolerate maximum pressures, and install backflow and anti-slam measures.
Stay proactive with scheduled maintenance and pressure checks. This way, filtration, iron, sulfur, and bacterial controls keep performing safely and efficiently.
You may also like: Iron And Manganese Water Filters — a related guide worth bookmarking.
You may also like: Smell Well Water Filter Systems — a related guide worth bookmarking.