Whole House Vs Under Sink Water Filtration
You need filtration sized to your household flow and contaminants, not just a single-tap cartridge.
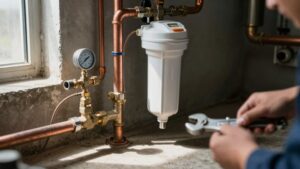
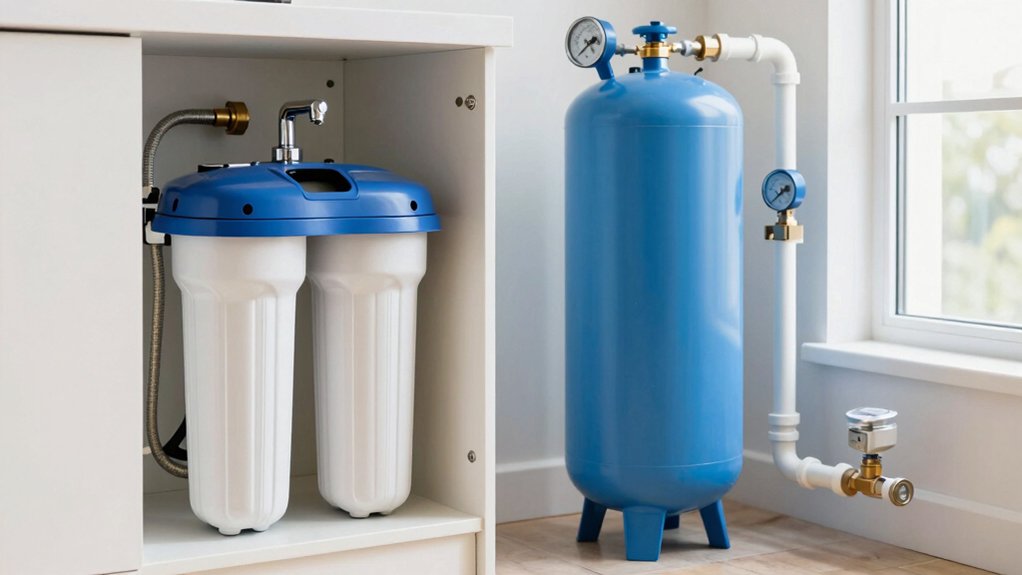
Whole-house (point-of-entry) systems handle high flow (8–12+ GPM); they protect appliances and use larger media with long service life.
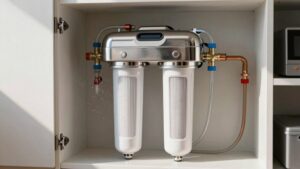
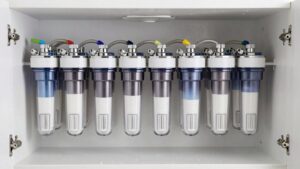
Under-sink (point-of-use) units focus on drinking water at low flow, often with RO and finer removal. Replace cartridges and membranes per specs and watch pressure drop. Keep going and you’ll find specific capacity, bypass and maintenance guidance to match your needs.
Quick Overview
- Whole-house (point-of-entry) systems protect every fixture and plumbing by treating high flow rates (≈9–10+ GPM) for long-term use.
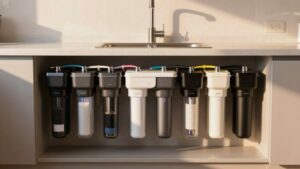
- Under-sink (point-of-use) systems focus on drinking and cooking water at low flow (0.5–1+ GPM) with higher contaminant removal.
- Choose whole-house for sediment, chlorine, and scale protection throughout the home. Choose under-sink for targeted contaminant removal and taste improvement.
- Replacement intervals differ: whole-house cartridges 6–12 months; under-sink filters 3–12 months; RO membranes 2–5 years.
- Consider plumbing impact and bypass needs: whole-house systems require bypass/valves for service. Under-sink units are smaller and easier to install.
Flow Rate & Capacity Chart
How much water do you need, and where do you need it? You’ll compare system flow rate and capacity to match supply to demand: whole house handles 9–10+ GPM and ~1M gallon capacity for years. Under-sink provides 0.5–1+ GPM with daily or tanked capacity for drinking. Use the chart to pick based on fixtures, pressure, and contaminant targets.
| System | Flow Rate (typical) | Capacity/Use |
|---|---|---|
| Whole house sediment/carbon | 9–10+ GPM | ~1,000,000 gal — whole-home protection |
| POE general media | ~10 GPM | High continuous household volume |
| Under-sink RO/carbon | 0.5–1+ GPM | Daily drinking (10–800 GPD) — point-of-use only |
Match flow rate and capacity to points of use and expected contaminants.
Filter Replacement Intervals
Want to know when to change filters? You’ll base intervals on flow, contaminant load, and system type. Whole house filters often last 6–12 months for sediment cartridges; they last longer for specialty media. Under sink cartridges and RO membranes need 3–12 months and 2–5 years respectively.
Check pressure drop, taste, and manufacturer specs to stay within warranty coverage and maintain energy efficiency for pumps and softeners.
- Inspect pressure gauges monthly; replace when drop exceeds spec.
- Replace carbon cartridges every 6–12 months for taste/VOC control.
- Swap RO pre/post filters at 6–12 months; replace the membrane at 2–5 years.
- Change whole house sediment filters sooner with well water or visible grit.
- Record dates to preserve warranty coverage and optimize energy efficiency.
Hidden Sediment Bypass Valve
When you inspect a sediment bypass valve, note that its primary purpose is to route heavy particles around the main filter so the system keeps supplying water instead of clogging. You’ll want to understand whether the valve is manual or automatic, where it’s mounted (in-line near the point of entry, before the cartridge, or on a pre-filter housing), and how its operation reduces back pressure that leads to premature fouling.
Check and service the valve regularly. Operate it to flush trapped sediment, confirm seals aren’t leaking, and replace any worn components to keep the bypass effective.
Purpose Of Bypass Valve
Why would a bypass valve be built into a sediment filter assembly? You need a bypass valve purpose that keeps water flowing when the filter needs service or replacement. It lets you isolate the cartridge without shutting off the main supply; this minimizes downtime for whole house systems and protects appliances during maintenance.
Mechanically simple, the bypass channels unfiltered water around the housing while seals prevent leakage into the filtered line. For practical bypass valve maintenance, exercise the valve periodically, check O-rings and threads, and replace worn seals to prevent unintended bypass or leaks.
When you install or service under-sink or point-of-entry units, label valve positions and verify flow and pressure after switching back to the filter to ensure proper operation.
How It Prevents Clogging
A hidden sediment bypass valve prevents clogging by giving trapped particles an alternate path, so the filter doesn’t become a choke point during high-sediment events. You’ll rely on the valve to reroute heavy particulate-laden flow around the primary cartridge, maintaining service to fixtures while the filter accumulates debris.
In practice, the bypass opens at a set differential pressure or manual setting; it diverts flow through a parallel channel that minimizes head loss and preserves system pressure. This sediment bypass approach supports clog prevention by avoiding immediate shutdowns and reducing peak loading on the media. It buys you time to perform planned maintenance.
You should still schedule cartridge inspections. The bypass is a protective measure, not a substitute for timely filter replacement.
Manual Versus Automatic Operation
Since the bypass valve keeps flow moving during high-sediment events, you need to decide whether it should operate manually or automatically based on your maintenance habits and system demands.
If you choose manual operation, you’ll get a simple, reliable valve you can open when you notice pressure loss or visible sediment. It’s low-cost and easy to service but requires regular monitoring and prompt action to avoid downstream wear.
Automatic operation uses sensors or timed actuators to switch flows when clogging thresholds are reached; so you won’t need constant oversight. It reduces risk of unnoticed bypass and protects appliances but adds complexity, power needs, and higher initial cost.
Match choice to your routine, budget, and system criticality.
Installation Location Options
Where should you place a hidden sediment bypass valve so it protects downstream equipment without creating maintenance headaches? You’ll mount it immediately downstream of the main shutoff and ahead of pressure tanks, softeners, or whole-house filters so coarse particulates divert during service without exposing appliances.
Position it in an accessible utility space—garage or basement—where you can isolate lines, drain, and monitor flow. That location minimizes added installation cost by avoiding long pipe reruns and simplifies future servicing. If you’re unsure about pipe layout or local codes, opt for professional installation; a plumber will size valves, add isolation unions, and ensure watertight fittings.
Conceal the valve in a labeled, reachable panel to balance protection with straightforward access.
Maintenance And Inspection Tips
Having the bypass valve mounted in an accessible garage or basement makes routine maintenance straightforward. You’ll want a short checklist to keep it reliable: inspect the valve body and connections monthly for leaks or corrosion; exercise the valve (open and close) every three to six months to prevent seizure; check downstream pressure during operation to confirm the valve is diverting sediment as intended; and verify isolation unions and drain lines are clear before any service.
You should document each action in maintenance planning logs, noting dates, pressure readings, and any parts replaced. Use compatible lubricants and replacement seals to avoid contamination. Proper inspection and timely service extend system longevity, reduce unplanned downtime, and keep your whole-house filtration performing as designed.
Troubleshooting Common Issues
How do you tell if a hidden sediment bypass valve is causing problems in your whole-house system? Check for sudden pressure drops, muddy water at faucets, or unexplained sediment downstream. These point to a bypass stuck open or leaking.
Isolate the valve: close it, observe pressure and clarity, then reopen slowly. Listen for hissing that indicates internal leaks. Inspect seals and actuator linkage; mineral buildup or worn O-rings often cause failure.
Don’t confuse these signs with unrelated issue sources like faucet aerators or appliance strainers. Those are an irrelevant topic when diagnosing the bypass. If cleaning and seal replacement don’t restore function, replace the valve. Document changes and test after each step so you can confirm the bypass was the root cause.
Frequently Asked Questions
Can a Whole House Filter Improve Skin and Hair Health?
Yes, a whole house filter can improve skin and hair health. You’ll reduce chlorine, sediment, and iron at every tap, which prevents dryness, irritation, and dull hair. Whole house systems lower mineral and contaminant exposure during showers and laundry. This delivers measurable skin and hair benefits across the home.
You’ll also protect appliances and plumbing, and enjoy consistent water quality without needing separate point-of-use treatment for bathing.
Will Under Sink Systems Remove PFAS Effectively?
Yes, under sink systems can remove PFAS effectively if you choose the right technology. You’ll want reverse osmosis or activated carbon units certified for PFAS removal; check NSF/ANSI listings.
Consider installation considerations like space under the sink, a dedicated faucet, drain connection for RO, and possible pressure requirements. Expect regular cartridge or membrane replacements and verify manufacturer claims with lab reports to ensure sustained PFAS removal performance.
How Much Does Installation Labor Typically Cost?
You’ll typically pay $200–$800 for installation labor depending on system type and complexity. Under-sink installs trend toward the lower end if you do a simple filter and DIY prep. Whole-house installs or RO setups often push costs higher due to plumbing/space work.
Ask if the contractor handles replacement filter disposal: some include it in service contracts; others charge extra. Get written estimates and scope of work before hiring.
Can I Combine Whole House and Under Sink Systems?
Yes, you can combine Whole house and Under sink systems. You’ll install a Whole house prefilter at the main inlet to remove sediment and protect pipes and appliances. Then add an Under sink unit (often RO or carbon) for targeted contaminant removal at the kitchen tap.
This setup’s practical: lower maintenance upstream, better taste and PFAS/TDS reduction downstream. Expect coordinated installation and periodic separate filter replacements.
Are Replacement Filters Recyclable or Disposable?
They’re mostly disposable; though some replacement filters have recyclable components. You’ll usually replace cartridges and dispose of spent media. Check manufacturer guidance for recycling programs or local facilities that accept polypropylene housings, activated carbon, or metal parts.
For safe disposal options, rinse housings, separate metals/plastics, and use household hazardous waste sites for spent media with captured contaminants. Consider vendor take-back or mail-back programs to minimize landfill waste.
Conclusion
Choose the system that matches your flow needs, space, and maintenance willingness: whole‑house units handle high flow and protect all fixtures but need larger filters and scheduled replacements. Under‑sink units give targeted purification with easier filter swaps.
Use the bypass valve to divert heavy sediment during service and prevent clogging; prefer automatic valves if you want hands‑off operation. Inspect fittings, monitor pressure drop, and follow replacement intervals to keep performance reliable and avoid unexpected downtime.
You may also like: House Vs Faucet Filter Differences — a related guide worth bookmarking.
You may also like: Of Use Filtration Decision Framework — a related guide worth bookmarking.
You may also like: Whole House Water Filter System — a related guide worth bookmarking.