Refrigerator Water Filter Model Number Locations by Brand
You’ll usually find your refrigerator’s water filter model number in predictable spots by brand: check the fresh-food ceiling or kickplate on Whirlpool units.
The center interior on Samsung, the pull-up door area on GE, the side wall on LG, and the grille or interior on Frigidaire are other common locations.
Inspect back upper-right corners and under grilles for hidden cartridges; twist, quarter-turn, or push-button mounts are common.
Keep the model handy for replacements and continue for reset and replacement guidance.
Quick Overview
- Whirlpool filters often list model numbers on the filter housing in the ceiling or kickplate area near the filter quarter-turn cap.
- Samsung filter model numbers are usually printed on the twist-out cartridge visible at the center interior or behind a cover.
- GE filter model numbers appear on the pull/eject cartridge or on a label behind the pull-up door in the fridge interior.
- LG model numbers are printed on the side-wall or on the push-button removable cartridge along the interior wall.
- Frigidaire model numbers can be on the grille, inside the compartment, or on the cartridge label depending on the model.
Filter Location by Brand
1 clear way to find your refrigerator’s water filter is to check brand-specific common locations: Whirlpool/Everydrop units often hide model labels and filters on the ceiling, inside freezer walls, behind door frames, kickplates, or back panels. Samsung places its filter dead-center for a simple twist-out. LG and Frigidaire vary by French-door vs side-by-side layouts with filters in interior walls or near the grille. GE commonly tucks filters behind small pull-up doors on French-door models or in different slots on side-by-side units.
You’ll inspect ceilings, back upper-right corners, side walls, or the grille. Use model numbers with manufacturer filter finders for brand compatibility. Installation tips: align, quarter-turn or push-button; don’t over-tighten.
| Brand | Common Spot | Removal |
|---|---|---|
| Whirlpool | Ceiling/kickplate | Quarter-turn |
| Samsung | Center interior | Twist-out |
| GE | Pull-up door | Pull/eject |
| LG | Side wall | Push-button |
| Frigidaire | Grille/interior | Varies |
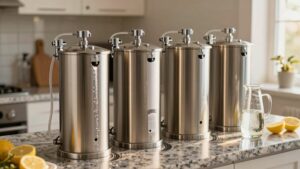
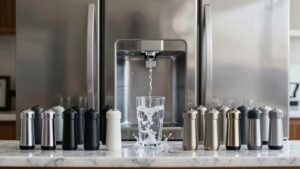
Filter Change Frequency Guide
How often should you change your refrigerator water filter depends on usage, water quality, and the filter type. You will typically replace standard carbon filters every 6 months or about 200 gallons. High-capacity or specialty filters can last up to 12 months. Heavy sediment, hard water, or a drop in flow or taste warrants earlier replacement.
You should follow a clear maintenance schedule based on your observed flow rate, taste, and local water conditions. Track replacement dates and gallons used if your fridge tracks usage.
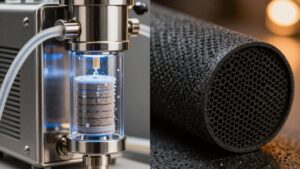
- Visualize clogged media: darkened carbon, reduced flow, cloudy ice.
- Visualize hard-water scaling: mineral buildup at inlet/output fittings.
- Visualize taste change: metallic or off-flavors indicating exhausted media.
Use filter frequency data to set reminders.
Filter Reset Instructions
You’ll usually find the reset control near the filter compartment, on the control panel, or behind a small access door. Consult your model label locations first.
Press-and-hold sequences or a dedicated reset button clear the indicator; follow the manufacturer timing (typically 3–5 seconds) and confirm the light or message resets. If the indicator won’t reset, check power; cycle the refrigerator, reseat the filter, and verify you installed a compatible OEM or approved replacement.
Where To Find Reset
Where do you locate the filter reset control? You’ll usually find the reset control on the refrigerator control panel: either inside the fresh-food compartment ceiling, on the dispenser console, or on the top edge of a door.
Don’t confuse unrelated topic indicators, like service menus, with the reset; those are irrelevant reset references and won’t clear the filter timer. Use the manufacturer’s labeled button, often marked “Reset,” “Filter,” or a droplet icon.
For models without a dedicated key, press and hold the water/filter button for 3–5 seconds. If nothing happens, consult the user manual for the exact press duration and location specific to your model. Record the procedure once confirmed for future reference.
Reset Button Locations
Now that you know where the filter reset control usually lives, locate the specific reset button before changing the filter. Check panel areas: control panel, inside fridge ceiling, or near dispenser housings.
Press-and-hold routines vary by brand; two to ten seconds is common, so consult your manual if uncertain. Observe reset indicators: LEDs, digital icons, or color bands that confirm the command. After replacement, actuate the button until the indicator confirms a cleared status or the timing display resets to zero or six months, depending on your model’s filter timing settings.
If the indicator doesn’t respond, cycle power for ten seconds and retry. Note that models with touchscreen menus require on-screen resets rather than a physical button.
How To Reset Indicators
How do you clear the filter indicator after installing a new cartridge? You’ll follow brand-specific button or menu steps; don’t treat reset as an unrelated topic or an irrelevant concept.
For most models, press and hold the filter/reset button (or ice/water button) for 3–10 seconds until the LED changes or the display resets. On touch-screen panels, navigate to Settings > Filters > Reset and confirm. For models with rotary knobs, rotate to RESET position and hold briefly.
If no dedicated control exists, cycle power off for 30 seconds after installation to allow the control board to reinitialize. Verify the indicator stays off and run a small water dispense to confirm proper operation. Consult the manual for model-specific timing and button labels.
Reset Timing Guidelines
After you reset the indicator, you’ll want to follow specific timing guidelines to guarantee the refrigerator’s control board and sensor logic register the new cartridge correctly. Wait at least 5–10 seconds after powering the unit back on before initiating the reset sequence; this allows the control board to complete its boot cycle.
After the reset, run two full water dispenses (about 2–3 gallons total) within the first 24 hours to purge air and prime flow sensors. Align your reset to the maintenance schedule: record the date and expected next change.
If your brand location uses an electronic sensor, allow 24 hours for chemistry sensors to stabilize. For manual indicators, verify the counter increments after 24–72 hours of normal operation.
Troubleshooting Reset Issues
Troubleshooting a filter reset that won’t register? Start by confirming the exact model number and reset procedure in the manual: some brands use button holds, while others use menu navigation.
Power-cycle the refrigerator for 30 seconds to clear transient faults. Check that the filter is fully seated; a partial install often prevents electronic confirmation. Inspect the display and control board for water damage or corrosion; replace connectors if pins are bent.
If the indicator still won’t clear, run a diagnostic mode per manufacturer instructions to read error codes. Don’t get distracted by unrelated topic chatter or irrelevant discussion in forums; rely on model-specific guidance and official troubleshooting steps.
If problems persist, contact certified service for control-board replacement.
Frequently Asked Questions
How Can I Tell if My Filter Is Genuine or Counterfeit?
You verify authenticity by checking manufacturer markings, holograms, serial/model numbers, and packaging against the brand’s official specs. Scan QR codes or use the maker’s online verification tool to confirm serials. Compare weight, fit, and connector geometry to OEM standards.
Distinguishing counterfeit parts involves poor molding, missing certifications, incorrect materials, and degraded performance. If in doubt, buy from authorized dealers and document serials for warranty and support.
Do Aftermarket Filters Void My Refrigerator Warranty?
Yes, using aftermarket filters can affect warranty implications. Manufacturers often state that damage caused by non-OEM parts isn’t covered. Therefore, if an aftermarket filter causes a leak or component failure, the repair may be denied.
You can still use aftermarket filters; however, document installation, keep receipts, and check your refrigerator’s warranty terms. Consider OEM filters for full protection and to avoid disputes over the cause of damage.
Can I Drink Water Immediately After Installing a New Filter?
Yes, you can usually drink water immediately after a quick installation; however, you should flush the system first to assure water safety after install. Run several gallons (or the manufacturer’s recommended number of cups) to clear carbon fines and trapped air; discard that water.
Check for leaks and proper seating. After flushing, the taste should be clean and odor-free; then you can safely drink from the dispenser or faucet.
Are There Recyclable or Eco-Friendly Filter Disposal Options?
Yes, you can use recycling programs and eco-friendly disposal routes for many fridge filters. Check manufacturer take-back or retailer drop-off programs, municipal hazardous-waste centers, and mail-back services that handle activated-carbon cartridges.
Rinse and dry housings if required; follow program instructions and separate recyclable plastics and metal. If no program exists, dispose per local guidelines to avoid landfill contamination. Consider certified low-waste filter replacements with recyclable components.
Will a Clogged Filter Affect Ice Maker Performance?
Yes, a clogged filter will reduce water flow and pressure; therefore, your ice maker will make smaller, slower, or hollow cubes and may stall. You should replace with a genuine filter to restore proper flow and protect the valve and ice quality.
Check for reduced fill cycles, noisy pump operation, or error codes. Regularly change filters per manufacturer specs to avoid ice production issues and potential appliance damage.
Conclusion
You’ve now got quick, brand-specific locations for your fridge’s water filter, clear guidance on how often to swap it, and straightforward reset steps. When your indicator won’t reset, check the exact button or dial location; consult the manual and try power-cycling the fridge before replacing the filter or sensor.
Keep a maintenance log and use OEM filters to avoid false alerts. Regular timely resets ensure accurate monitoring and safe drinking water.
You may also like: Refrigerator Water Filter Model Number — a related guide worth bookmarking.
You may also like: An Internal Or Inline Filter — a related guide worth bookmarking.
You may also like: Refrigerator Water Filter Compatibility Guide — a related guide worth bookmarking.