How to Choose Safe Water Sources While Hiking
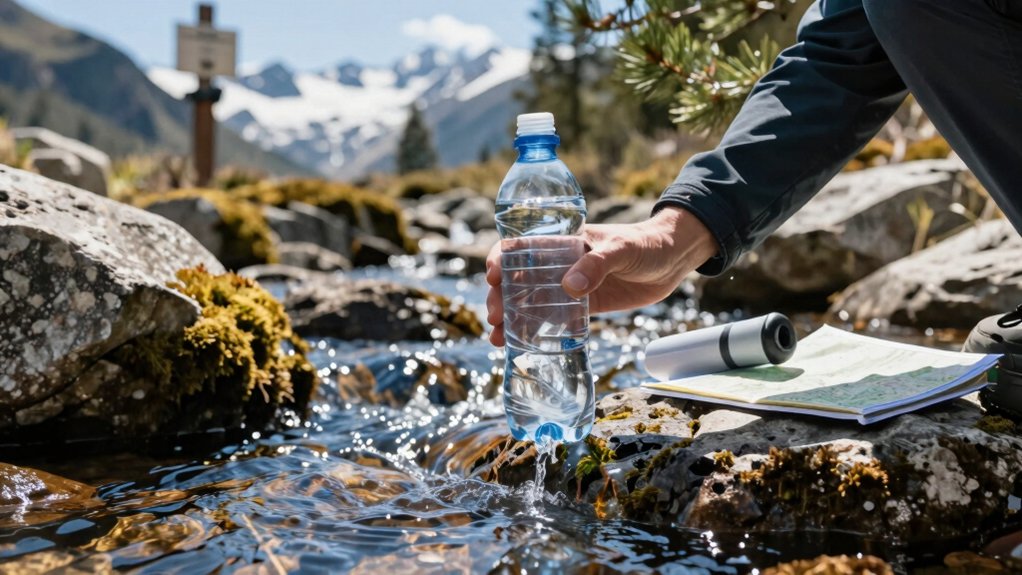
Favor clear, flowing high-elevation springs and small headwater trickles. Avoid stagnant, shallow, or heavily used spots since flowing, upstream sources usually carry the fewest pathogens.
Look upstream for minimal human or stock activity, low sediment, and visible flow. Beware lakes, beaver ponds, shorelines, and populated areas. Always treat water to match risk: filter for protozoa/bacteria; add chemical or boil for viruses. Keep a backup plan.
Keep going and you’ll find practical treatment and altitude tips next.
Quick Overview
- Prefer flowing, high-elevation springs or headwater streams to reduce pathogen and sewage risk.
- Avoid stagnant ponds, beaver ponds, and below-stock areas where wildlife and sediment increase contamination.
- Visually check upstream for clear flow, minimal human activity, and low turbidity before collecting water.
- Choose treatment based on source risk: filters for protozoa/bacteria; chemical or UV for viruses; or boil as backup.
- Plan capacity and maintenance: confirm filter pore size, lifespan, clog resistance, and carry spare treatment options.
Water Source Contamination Levels
How risky is a given backcountry water source? You should prioritize flowing, high-elevation springs and headwater streams because they typically lower pathogen risk. Stagnant, shallow, or heavily used sites increase contamination likelihood. Use visual checks and upstream location to inform choices.
| Source type | Typical risk | Practical sign |
|---|---|---|
| High alpine springs | Low–Moderate | Clear flow, minimal upstream use |
| Small headwater streams | Low | Trickling flow, low sediment |
| Lakes/large rivers | Moderate | Turbidity, algae, shoreline insects |
| Below stock line/beaver ponds | High | Ponding, visible wildlife activity |
Remember that populated areas carry extreme risk due to viruses and sewage. When in doubt, collect upstream; avoid obvious contamination and treat accordingly to mitigate pathogen risk.
Filter Ratings & Lifespan
What should you look for on a filter’s spec sheet? Check pore size, stated removal targets (protozoa, bacteria, viruses), and real-world test standards. Match claims to route risk and group size.
Filter lifespan is rated micro-liters or liters before replacement; confirm lab-verified numbers.
Filter capacity includes flow rate under typical source conditions and expected sediment load.
Consider clog resistance and recommended backflush frequency for field maintenance.
Also, check compatibility with your containers and ease of repair or spare-part availability.
Lastly, review warranty, certifications (NSF/ANSI or independent lab), and cold-weather performance notes.
Use rated lifespan and capacity to plan spares or backups. Prioritize filters with verifiable lab data and simple maintenance to avoid surprises on trail.
Boil Time for Altitude
At higher elevations, water boils at lower temperatures; so you can’t rely on a rolling boil time used at sea level to guarantee pathogen kill. Add a minute or two for every 1,000 meters (about 3,300 feet) gained. Use a pressure cooker when weight and fuel allow to reach higher temperatures. Remember cold ambient temps lengthen heating time.
Practically, always bring a small thermometer or follow conservative extended-boil guidelines. Prioritize treated or filtered sources when fuel is limited.
Boiling Point Changes
Why does water take longer to kill pathogens as you climb higher? Because boiling point changes with altitude: lower air pressure reduces the temperature at which water boils, so you’re not reaching 100°C. You’ll need longer exposure to inactivate microbes.
Use evidence-based guidance: at sea level a rolling boil for 1 minute is sufficient; above 2,000 meters extend to at least 3 minutes, and at higher elevations adjust further. Carry a compact stove and thermometer if you want precision, but a practical hiking rule is to increase boil time with elevation.
Remember boiling kills pathogens reliably even if slower; it’s a robust backup when filters or chemicals fail. Note altitude temperature effects cause the change, so plan your fuel and time accordingly.
Altitude Temperature Effects
How does altitude change the time you need to boil water? At higher elevations, lower air pressure reduces boiling temperature; thus, water reaches a rolling boil at a lower heat point. You’ll see altitude effects as faster boiling but reduced pathogen-kill efficiency at the same visible boil.
Temperature effects mean water held just at a simmer may not inactivate organisms as reliably as at sea-level boiling. Practically, you should bring water to a vigorous, continuous boil and maintain it for a few extra minutes compared with sea-level guidance.
Carry a reliable stove and wind protection to achieve consistent boiling. If you can’t sustain a vigorous boil, use filtration plus chemical treatment as a backup to address microbial risk.
Extended Boil Durations
Wondering how long you should boil water as elevation climbs? At higher altitudes, water boils at lower temperatures; so you’ll need an extended boil to reliably kill pathogens. Evidence-based guidance recommends adding about one minute of rolling boil for every 1,000 feet above 6,500 feet; though exact time varies with pathogen risk and local conditions.
Practically, bring water to a vigorous boil, maintain it for the adjusted period, and avoid gentle simmers that don’t sustain temperature. Account for altitude concerns by planning extra fuel and time, and by testing equipment beforehand. If you’re pressed for fuel, prioritize boiling when source quality is uncertain; otherwise, use filtration plus chemical treatment as a backup.
Pressure Cooker Benefits
Consider using a pressure cooker when you’re boiling water at high elevation: by raising the boiling temperature inside a sealed, pressurized pot, it shortens the time needed to inactivate pathogens compared with open-pot boiling. This is helpful where water boils at lower temperatures. You can reliably reduce boil times and achieve pasteurization-equivalent conditions faster, which matters when fuel is limited or wind makes long open boils impractical.
Use measured times from manufacturers or public-health guidance for specific pressures; do not assume arbitrary short cycles suffice. Note that reliance on a pressure cooker doesn’t excuse collecting from marginal sources. Severe water source noncompliance (visible contamination, industrial runoff) still requires avoidance or advanced treatment beyond pressurized boiling.
Practical Safety Tips
Why does altitude matter when you boil water? At higher elevations, water boils at lower temperatures; so you need to extend boil time to reliably inactivate pathogens. At sea level, a full rolling boil for 1 minute is sufficient. Above 2,000 meters (about 6,500 feet), boil for 3 minutes.
Use a reliable thermometer if you want exact temps; however, time-based rules work in the field. Don’t confuse this with an unrelated topic like cooking times for kitchen appliances: purification targets microbes, not texture. If fuel is limited, combine filtration or chemical treatment with a shorter boil as redundancy.
Always cool and store boiled water in clean containers. Label or segregate containers to avoid cross-contamination.
Frequently Asked Questions
Can I Drink Directly From a Running Stream Without Treating It?
No, you shouldn’t drink directly from a running stream without treating it. For drinking safety, flowing water reduces risk; however, it still carries contamination sources like upstream animals, farms, or microbes.
You should use water treatment before drinking: filtration methods (squeeze, pump, gravity, or hollow-fiber) or boiling are reliable. Combine chemical disinfectants with filters if needed. Always choose the clearest, fastest-flowing spot to minimize sediment and clogging.
How Do I Locate Seasonal Springs on a Map?
Check maps and topo layers to locate seasonal springs quickly: use USGS topo contours, spring symbols, and hydrology layers for map identification. Compare trail maps, satellite imagery, and crowd-sourced reports to confirm wet spots.
Consult local ranger notes and seasonal water reports for known seasonal springs and flow timing. Mark likely emergence zones near ridgelines, saddles, and valley heads. Then plan route and water caches accordingly.
What’s the Best Container for Long-Distance Water Carrying?
The best container for long-distance water carrying is a hard plastic bottle (like Nalgene) or a durable hydration bladder, depending on your needs. You’ll prioritize best material containers: BPA-free, impact-resistant plastics or medical-grade bladders for durability and weight.
Choose leak proof designs with secure caps or bite-valve covers. Hard bottles resist punctures and measure portions; bladders save pack space and sip efficiency. Carry a backup and clean regularly.
Can I Rely on Trail Reports From Social Apps?
You can, but cautiously: trail reliability on social apps varies and social app bias can skew reports toward recent, dramatic, or popular routes.
Use crowd-sourced updates as one data point; check multiple reports and note timestamps. Favor those with photos or ranger confirmation. Cross-reference maps and official sources; carry contingency water and plan for seasonal variability.
Treat app reports as useful clues, not guarantees, when deciding on refill strategies.
How Do I Safely Collect Water From Near Riverbanks?
You should scoop from flowing, clear spots a few feet off the bank, avoiding mud and vegetation. Prioritize riverbank safety by stepping carefully on stable ground or using rocks to reach clearer water.
Employ a dedicated scoop or cookpot. Collect upstream of camp and trails, and minimize bank disturbance to follow water collection ethics. Filter or boil promptly. Carry extra to avoid repeated trips and reduce impact on sensitive edges.
Conclusion
When you’re hiking, prioritize clear, fast-moving sources (springs, upstream of camps) and avoid stagnant water, animal trails, or near campsites: these raise contamination risk.
Use filters rated for protozoa and bacteria; replace cartridges per manufacturer life. Treat filtered water by boiling or chemical disinfectant if viruses are a concern.
At altitude, boil longer because water boils lower: add a minute per 1,000 meters above sea level. Combine methods and stay conservative to protect health.
You may also like: Filter Vs Water Purifier Difference — a related guide worth bookmarking.
You may also like: Camping Water Treatment Decision Tree — a related guide worth bookmarking.